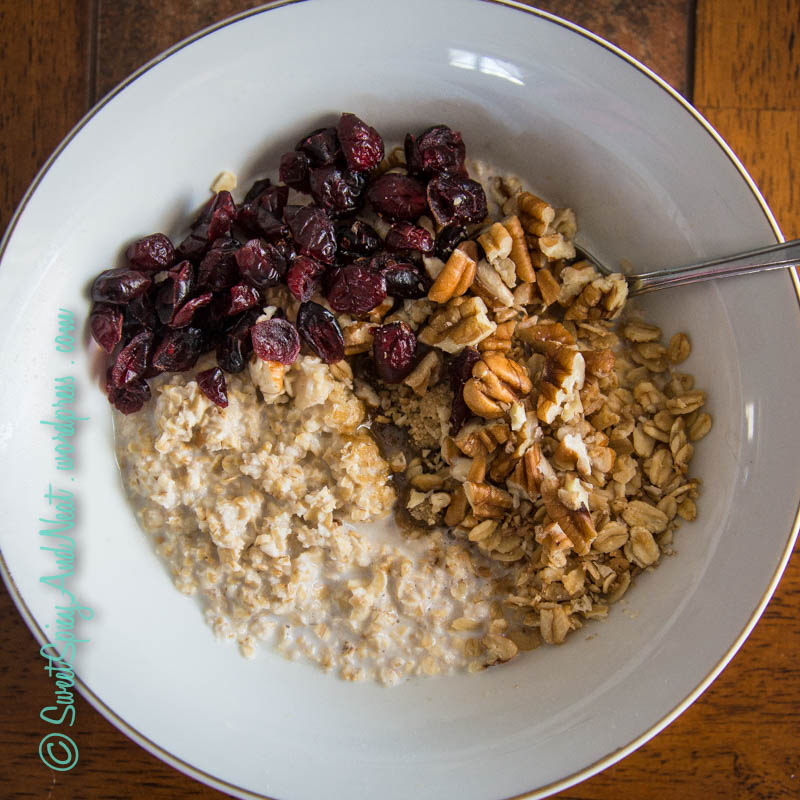
If you’ve been following my blog for a while, you know that I work from home. Therefore, breakfast for me should be pretty simple – just get up and cook whatever is on hand, and voila, I have a nutritious, filling breakfast every day!
This is great in theory, but I also happen to be a full-time college student, and I make sure to register for 8am classes so that I can beat rush hour and then be out of classes by noon. So, on those days of the week when I have to leave the house at 6:30 in the morning for an hour long commute, I definitely need a breakfast that is quick, simple, and won’t leave my stomach rumbling only an hour or two later!
This blog post is dedicated to some of my favorite simple breakfast ideas that are not only really easy, but also very portable, so you can eat them on the go!

BONUS: They are all pretty good for you, too! Each one has a variety of elements that help to keep the meal balanced and keep you feeling full!
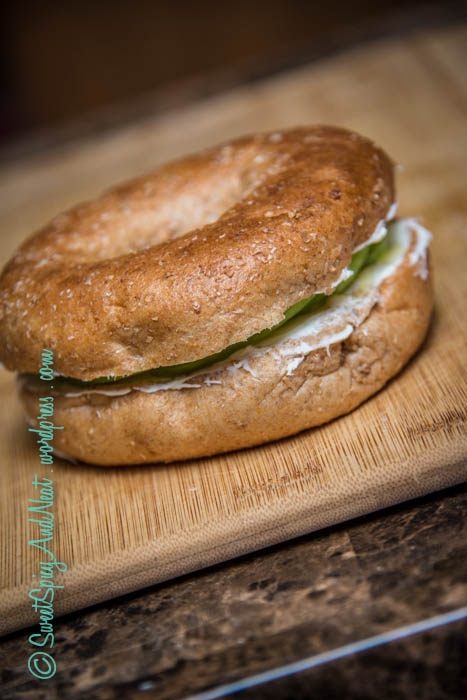
Whole Wheat Bagel with Mascarpone & Apples
This one is probably my favorite. The combination of flavors really has a lot of depth and they blend well together. I also think this one is the most filling!
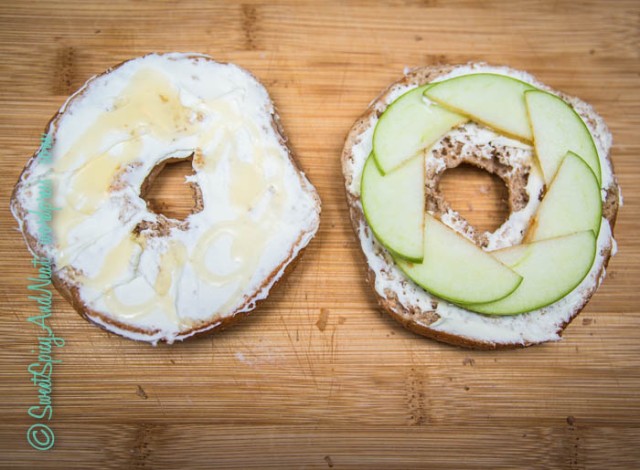
All you do is take a whole wheat bagel, spread each half with mascarpone cheese (or cream cheese, if you prefer), drizzle with honey, and lay apple slices on top! Sandwich it together and you’re done! I make this one the night before, wrap it tightly in foil, and leave it in the fridge overnight. That way, in the morning, I just grab it and go!

Bagel-Apple-Sandwich
Yield: 1 sandwich
Ingredients:
1 whole wheat bagel
2 tbsp mascarpone cheese
1 tsp honey
1/4 apple, sliced thin
Process:
Spread each bagel half with mascarpone cheese. Drizzle honey, top with apple slices, and sandwich together. Can be stored overnight in refrigerator if necessary.
Good for you stuff:
Calories: 440
Fiber: 5.85g (24% DV)
Protein: 11g
Iron: 21% DV
Vitamin A: 8% DV
Vitamin C: 5% DV
Whole Wheat Banana & Nutella Sandwich
This one has all the sweetness of dessert without being horribly bad for you! I absolutely love Nutella because it is so versatile and goes with so many things – if it’s not a staple in your house, it will be soon!

Toast two slices of whole wheat bread and spread each slide with Nutella. Slice about half of a banana (9 slices should be perfect) and lay them on one piece of the bread. Put it together and enjoy! This one should be eaten right away.

Banana & Nutella Breakfast Sandwich
Yield: 1 Sandwich
Ingredients:
2 slices whole wheat bread
2 tbsp Nutella
1/2 banana, sliced
Process:
Toast both slices of bread. Spread with Nutella. Top one piece with banana slices, then sandwich together.
Good for you stuff:
Calories: 390
Fiber: 6.5g
Protein: 10g
Iron: 10% DV
Calcium: 10% DV
Potassium: 6% DV
Vitamin C: 9% DV
Strawberry Banana Smoothie
There are a whole lot of really complicated smoothie recipes out there that use a dozen and a half different ingredients to pack every possible ounce of nutrition into them. These have some merit, to be sure, but a lot of that stuff isn’t in the typical household (from what I’ve found) and it means it takes longer to put it together. This smoothie has only 4 ingredients, so it’s really quick and simple.

In a blender, blend 1 banana, 3/4 cup strawberries (I buy the frozen sliced kind), 3/4 cup orange juice, and 1 container Yoplait Light Strawberry & Banana yogurt until smooth. Pour into a glass and enjoy! You can get some pretty awesome plastic re-usable travel cups from just about anywhere that are great for on-the-go smoothies.

Strawberry Banana Smoothie
Yield: 1 serving
Ingredients:
1 container Yoplait Light strawberry-banana yogurt
3/4 cup orange juice
3/4 cup strawberry slices
1 banana, sliced
Process:
Blend all ingredients in a blender until smooth. Pour into a glass and enjoy!
Good for you stuff:
Calories: 315
Fiber: 5g
Protein: 9.5g
Iron: 3% DV
Calcium: 24% DV
Potassium: 12% DV
Vitamin A: 15% DV
Vitamin C: 212% DV
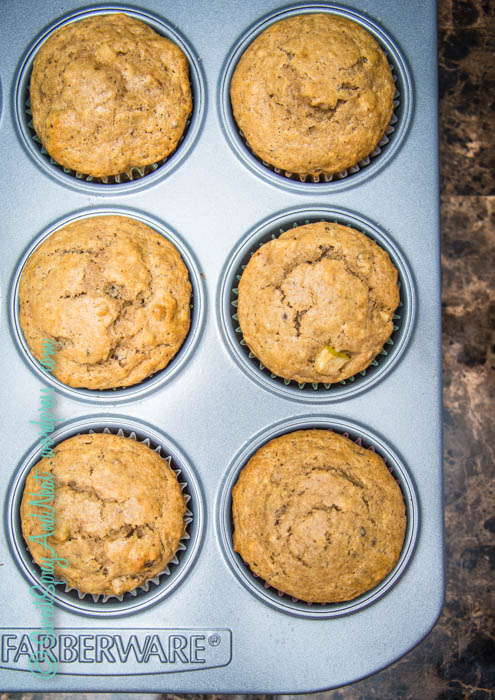
Apple Pecan Muffins
These do take a little bit of work the day before, but they stay fresh for a couple of days, so you can take a couple to work/school for a few days in a row! They didn’t even last 24 hours in my house, though!
Start by preheating your oven to 400 degrees and line a cupcake baking sheet with paper baking cups. In a small dish, melt 4 tbsp (half a stick) of butter in the microwave. (45 seconds should do.) Set the butter aside to cool, and then dice a small-medium granny smith apple and roughly chop 1/2 cup pecans. Put the pecans on a baking sheet and pop them in the oven while it’s preheating. (5 minutes or so.)
Continue by combining 1 cup flour, 1/2 tbsp baking powder, and 1/2 tsp salt in a small bowl. Set this aside, and then beat together 1 egg, 1/2 cup milk, 1/2 cup sugar, 1 tsp cinnamon, 1 tsp vanilla, and 1/4 cup apple butter in a stand mixer. Keep the mixer on and slowly pour in your melted butter until everything is incorporated.

Add your flour mixture to the liquid mixture and combine on the STIR setting for only a few seconds. You should still have flour visible:

Add in your apples and pecans and then combine on STIR setting again for another few seconds until everything is mixed.

MAKE OR BREAK TIP: You should have no more than 10 seconds or so of mixing time once you’ve added the flour to the bowl, and it is imperative you use the lowest possible setting on the mixer. If you don’t have a stand mixer, do this all by hand. Over-mixing the batter causes the muffins to be tough and dry instead of soft and moist!
Once your batter is combined, spoon it into your prepared baking pan. I found that it makes about 8-10 muffins if you fill each one almost to the top.

Bake for 15 minutes or until toothpick inserted into the center of one of the muffins comes out clean. Remove from oven and cool in pan for 5 minutes and then remove to a wire rack to cool completely. Serve immediately, or place in an airtight container for up to 2 days.
I think two of these muffins in an appropriate serving size that compares to the nutrition levels found in the other 3 recipes in this post.

Apple Pecan Muffins
Yield: 8-10 muffins
Ingredients:
1 small to medium granny smith apple
1/2 cup pecans
1 cup flour
1/2 tbsp baking powder
1/2 tsp salt
4 tbsp butter
1 egg
1/2 cup sugar
1/2 cup milk
1 tsp cinnamon
1 tsp vanilla
1/4 cup apple butter
Process:
1) Preheat oven to 400 degrees. Line a cupcake pan with paper baking cups.
2) Melt 4 tbsp butter in the microwave for 45 seconds. Set aside to cool.
3) Dice apple into 1/2 inch or smaller chunks and roughly chop pecans. Put pecans on a baking sheet and toast them in the preheating oven for about 5 minutes.
4) Combine flour, baking powder, and salt in a bowl. Set aside.
5) In a stand mixer, beat together egg, sugar, milk, cinnamon, vanilla, and apple butter. Slowly pour in melted butter while the mixer is still on.
6) Once everything is combined, stop, scrape down the sides of the bowl, and then add your flour mixture. Combine on stir setting for a few seconds, then add apples and pecans. Combine on stir for another few seconds until mixture is combined. (No more than 10 seconds total mixing time after flour is added!)
7) Pour into prepared baking cups and bake for 15 minutes or until toothpick inserted in center of one of the muffins comes out clean. Remove from oven and cool in pan for 5 minutes and then move to a wire rack to cool completely. Serve immediately or store in an airtight container for up to 2 days.