Corn & Black Bean Salad with Grilled Pork

As we have already discussed, colorful food is pretty much always the best. Nutrition experts say that in order to ensure you’re getting the best range of nutrients, you should try to eat every color of the rainbow in your foods. We Americans really don’t have a lot of dishes we can take credit for that are incredibly colorful and good for you… we pretty much can boast hot dogs and fried chicken, neither of which are exceptionally high on the “eat this because it helps your health” meter. As I mentioned in my Greek Salad recipe, the Greeks are super well-known for being ultra health conscious in their food. However, today we are traveling to Mexico with a very classic Mexican dish known as corn salad. The cool thing about this is that it can be eaten hot, or cooked and then chilled and served cold, so it makes an awesome cookout side dish if you serve it without the meat.

DSC_4002text

There are a lot of elements to this that actually work well on their own, so I’ll separate it out that way. Check the recipe at the bottom if you’re unsure about how to time it so it all comes out at the same time. For the pork, I used boneless pork chops. This is so easy guys, I mean really. All you do is rub both sides of the pork chops with salt, pepper, garlic powder, cilantro, and ground cayenne. (The cayenne is what adds the heat, so bear that in mind when seasoning. If you don’t really like your food spicy, leave it out altogether.) Then, just put them on a grill over medium heat and grill for about 6-7 minutes per side, or until the internal temp reaches 160 degrees. This recipe serves 4 people, so use 4 pork chops.

DSC_3998

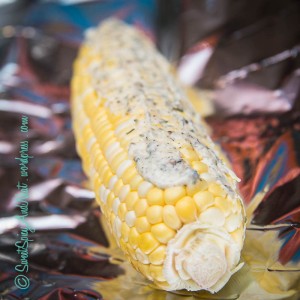
To really make this fresh and delicious, I used fresh corn on the cob for the corn base for the salad. This recipe for grilled corn is so super good, so feel free to steal it from this recipe and just make this bangin’ corn on the cob for your next barbecue! The key is seasoning the corn and then grilling it, instead of just boiling it in a pot of water. The real magic is in a seasoned butter – soften about 3 tablespoons of butter and add salt, pepper, garlic powder, and cilantro. (If you’re making the corn on the cob on its own, feel free to sub in whatever herbs you like!) Mix the seasonings into the butter and then slather it on 3 ears of corn. I have found that it’s easier to spread it on one side (as shown in the photo) and then use your hands to rub it around the whole ear.

DSC_3997

Once they are rubbed with the herb butter, wrap them tightly in aluminum foil and grill for about 15-20 minutes, over indirect heat, turning occasionally. Once it’s done, take it out of the foil and then cut it off the cob and set aside. The base of the salad gets made on the stove, not on the grill, so get a large skillet with about 2 tablespoons of canola oil over medium-high heat. To the heated pan, add a diced bell pepper and either one diced yellow onion or one diced red onion. (The red onion gives more powerful flavor and more color!) Once these have sweated (about 2 minutes), add in 3 cloves of minced garlic, a drained can of black beans, and 4 diced Roma tomatoes. (If you don’t have fresh tomatoes, use a can of diced tomatoes, drained.)

DSC_4000

Stir this together and add two teaspoons of salt and pepper, a teaspoon of dried cilantro, and a half teaspoon of cayenne. (Use more or less depending on your preferred heat level!) Let simmer for about two minutes and then add your reserved corn. Give it a final stir and then plate it, topping each plate with a sliced pork chop. Top with freshly chopped cilantro!

DSC_4009

This is a total crowd pleaser and a great way to shake up dinner in the middle of the week! The whole thing can also be made inside on a griddle or on the stove, so it works for all seasons, but it’s really a great summer dish!

Full Recipe:

Mexican Corn & Black Bean Salad with Grilled Pork

Yield: 4 servings (8 if you are making it as a side and not a main dish.)

Ingredients:

3 ears of fresh corn, husked
3 tablespoons softened butter
Salt, pepper, garlic powder, and cilantro (to taste)

4 boneless pork chops
Salt, pepper, garlic powder, cilantro, and cayenne (to taste)

2 tbsp canola oil
1 bell pepper, diced
1 yellow or red onion, diced
4 Roma tomatoes, diced
1 can black beans, drained
3 cloves garlic, minced
Salt, pepper, cilantro, and cayenne (to taste)

Process:

1) Heat half of your grill to medium heat.

2) Combine softened butter and spices and spread over ears of corn. Wrap corn in aluminum foil and place over indirect heat on your grill. (Remember to turn every few minutes. Corn should be done after about 15-20 minutes.)

3) Rub pork chops with spices on both sides. Spray heated half of grill with cooking spray and then place pork chops on heated side. (Cook for approximately 6-7 minutes per side, or until internal temp reaches 160 degrees.)

4) In a large skillet, heat 2 tablespoons of canola oil and add diced pepper and onion. Let sweat for two minutes, then add the garlic, beans, and tomatoes. Season with salt, pepper, cilantro, and cayenne, to taste.

5) While salad is simmering, take corn off the grill and cut the corn off the cobs. Once it’s all cut, add into the salad, give it a final stir, and then turn off the heat.

6) Plate the corn salad and put a sliced pork chop on top of each plate. Serve immediately.

Spinach & Mozzarella Chicken Roll Ups

We’re gettin’ fancy over here today, folks! Rolling up a delicious filling inside a thin piece of meat has long been a trick of restaurants to make a dish look polished and expensive. Truth is, you can do it right at home! This was super delicious and didn’t take much effort to get a restaurant-quality plate.

DSC_1473text

Now, I pulled a bit of a multi-tasking trick here. I knew I planned on making Parmesan rice with this (find the recipe here!) so I made more “filling” than I needed so that I could stir it into the rice. I highly recommend you do the same, because it makes the rice even better! The measurements I give allow for you to have that extra amount of filling.

In a skillet over medium heat, heat up a couple tablespoons of olive oil and then saute half a diced sweet onion and two cups of chopped frozen spinach. (Add lemon juice, salt, pepper, and basil while cooking.) When the onions start to become translucent, add 2 large cloves of minced garlic, toss, and then remove from the heat.

DSC_1469

For your chicken, take two large breasts and cut them in half so you have four thin slices. Salt and pepper each half, then sprinkle mozzarella cheese on the wider end of each. Spoon about 2 tablespoons of your filling on top of the cheese, then carefully roll up from the wider end to the thinner end. Place in a greased baking dish seam side down and then top with lemon zest, salt, pepper, and Parmesan cheese.

DSC_1470

Bake for 25 minutes at 425 degrees or until chicken is cooked through. Serve with Parmesan rice (don’t forget to stir in the extra filling!) and sauteed green beans.

(For the green beans: melt 2 tablespoons of butter in a large skillet over medium heat. Saute 1/4 finely diced onion or shallots for two minutes, then add 8 ounces frozen green beans, salt & pepper, reduce heat to low, and cover. Cook for 8-10 minutes or until green beans are cooked with a little crunch left to them.)

DSC_1479

Wow your family or entertain dinner guests with this fabulously fancy (and deceptively easy) dish! Serve with a mild white wine like Pinot Grigio if you’re feeling extra fancy. 🙂

Full Recipe:

Spinach and Mozzarella Chicken Roll Ups

Yield: 4 servings

Ingredients:

2 tbsp olive oil
1/2 sweet onion, diced
2 cups chopped frozen spinach
2 large cloves garlic, minced
Zest & juice of 1/2 a lemon
Salt, pepper, and basil, to taste
2 large chicken breasts, each cut in half into thin slices
1/2 cup shredded mozzarella cheese
1/4 cup Parmesan cheese

Process:

1) Preheat oven to 425 degrees.

2) Heat olive oil over medium heat in a medium skillet, then saute onions and spinach with lemon juice, salt, pepper, and basil until onions become translucent. Add garlic, toss, and remove from heat.

3) Salt and pepper each piece of chicken, then evenly divide mozzarella cheese on the wider end of each piece. Top cheese with 2 tablespoons of spinach filling, then carefully roll up each piece of chicken and place seam side down into greased baking dish.

4) Sprinkle lemon zest, salt, pepper, and Parmesan cheese on top of chicken, and then bake for 25 minutes or until cooked through.

5) Serve with Parmesan rice – stir extra filling into rice for added body and flavor.

Warm Greek Salad with Chicken

I’m pretty convinced that everything good in the world comes from the Mediterranean region. As my loyal readers know, Tuscany is probably my favorite place on the planet, as I illustrated in my most pinned and most popular blog post ever, Tuscan Pasta in Lemon Blush Sauce. (Guys, it’s been pinned 142 times as of today. That’s a LOT for a small town girl like me!)

But I digress.

A place I have yet to visit in the world (but is TOTALLY on my bucket list!) is Greece. Not only is that a country steeped to the bursting in history and rich culture, but their food is known for being natural and wholesome. The Greeks are not at all fans of processed food – most McDonald’s that have tried to open there have ended up closing. Because of this, it’s naturally the ideal kind of cuisine for someone like me.

So, I’m sure a lot of you frequently visit Panera or some other establishment that serves a “Greek Salad.” Usually, it’s mixed greens with some olives, peppers, and feta tossed on top. Now don’t get me wrong – I will tear up a Greek salad from Panera Bread if I’m waiting to meet a client there. But did you know, the classic “Greek” salad actually has no lettuce at all?

Yup, that’s right. It’s a tomato and cucumber based salad, tossed with red onion, green pepper, kalamata olives, and feta cheese, and dressed with an olive oil vinaigrette.

Mouth watering yet? Yeah, mine too.

Read on my for my take on the classic Greek salad – warmed up with sautéed chicken!

DSC_1397text

Mise en place – French for “everything in its place,” or doing all of your prepwork before you start cooking – is so important for this dish! The only thing you have to cook is the chicken, and that goes so fast that you’ll need to have everything else ready beforehand!

So, get yourself your favorite large cutting board (my father made mine for me, crafty gentleman that he is) and prep the following:

One pint cherry tomatoes, halved.

One cucumber, large dice.

One green pepper, small dice.

Half a red onion, small dice.

About 40 (ish) kalamata olives, pitted and roughly chopped.

Three cloves garlic, minced.

DSC_1394

MAKE OR BREAK TIP: Kalamata olives typically come with the pits still in them. To get them out, crush the olive under the side of a chef’s knife (sort of like how you’d smash a clove of garlic to peel it) until it smashes down and the skin breaks, then pull the pit out with your fingers. It’s a little tedious, but once you get a rhythm, it’s not so bad.

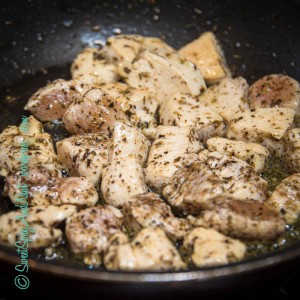
Once this is all done, cube two large chicken breasts into bite sized pieces. Put a couple tablespoons of olive oil in a skillet over medium heat, and once the pan is hot, add the chicken and season liberally with salt, pepper, oregano, and basil. Toss to coat and let simmer for five minutes or so, tossing occasionally. When it’s just about done, add your minced garlic, toss to combine, and cook for one additional minute.

DSC_1395

While the chicken is cooking, make your dressing by whisking together the zest and juice of one lemon, 3 tbsp extra virgin olive oil (the really good stuff!), 3 tbsp balsamic vinegar, and 1 tsp each of salt, pepper, oregano, and basil. I know it doesn’t look like a lot, but I promise, you only want a light coating of dressing!

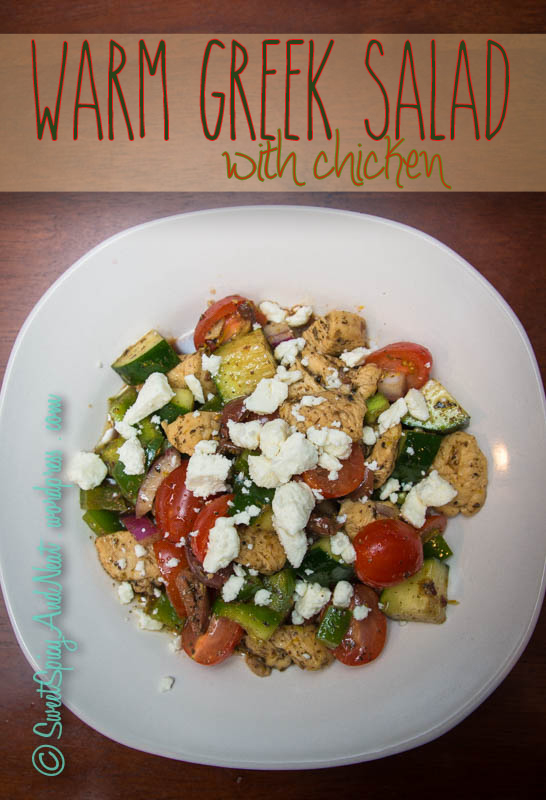
Once the dressing is done, add your prepped veggies to a large bowl and pour the dressing overtop. As soon as the chicken/garlic is finished cooking, get it off the heat and immediately into the bowl. Toss it all together so the heat from the chicken warms up the vegetables a bit, and then dish it out and top with crumbled feta cheese!

DSC_1399

We eat with our eyes before we ever taste with our tongues, and I have to say, the colors in this dish make it look SO appetizing – and the flavors packed into it don’t disappoint!

Alternatively, you could of course make this into a vegetarian dish by removing the chicken. (Removing the chicken also turns it into a super awesome side dish, especially for summer!)

Full Recipe:

Warm Greek Salad with Chicken

Yield: 4 servings

Ingredients:

1 pint cherry tomatoes, halved
1 cucumber, large dice
1 green pepper, small dice
1/2 red onion, small dice
Approx 40 kalamata olives, pitted and roughly chopped
3 cloves garlic, minced
2 large chicken breasts, cubed into bite size pieces
Zest + juice of one lemon
3 tbsp extra virgin olive oil (plus more for sautéing chicken)
3 tbsp balsamic vinegar
4 ounces crumbled feta cheese
Salt, pepper, oregano, basil, to taste

Process:

1) Prep all vegetables first (tomatoes, cucumber, pepper, onion, and olives), putting them into a large bowl as you finish each one.

2) In a small bowl, whisk together lemon zest and juice, olive oil, balsamic vinegar, and 1 tsp each of salt, pepper, oregano, and basil. Add to vegetables.

3) Cube chicken and add to a heated skillet with 2 tbsp olive oil. Season liberally with salt, pepper, oregano, and basil. Toss occasionally and allow to cook for about five minutes, or until cooked through. Just before chicken is done, add minced garlic and toss to combine, allowing to cook for one additional minute.

4) Remove chicken from heat and immediately add to the vegetables. Stir to combine. Sprinkle with feta cheese after serving.

Coconut Chicken with Pina Colada Glaze and Hawaiian Rice

Happy Valentine’s Day to all! This would be an awesome dish to make your valentine if you’re sick of the cold and want to imagine you’re in the tropics with a Mai Tai in your hand and not a care in the world! (Stay tuned later this week for my amazing take on a mai tai.) Of course, this is also just an awesome dish in general – I’d even wager that your kids would like it, as long as they don’t have anything against coconut or pineapple.

The title is a little of a mouthful (sorry!) but there’s a lot of moving parts to this meal and there’s just so many good things about it that I had to include as much in the title as I could!

DSC_1357text

The recipe following is for four, but feel free to adjust as necessary!

The first thing you’ll need to do is preheat your oven to 350 degrees, and then put together your breading assembly line. Doing any kind of “breading” process on meat is very simple, but so many people wind up with their yummy coating not sticking and falling off the meat! There’s an easy trick to it, as some may remember from my Parmesan Breaded Chicken (which was a popular hit on Pinterest!): you have to coat the meat in flour first, THEN egg, THEN the breading. Coating in flour first gives the egg something to stick on to, which then makes the breading adhere better!

So, you’ll need three shallow dishes:

Dish 1: 2 tablespoons of flour plus 1 teaspoon of salt plus 1/2 teaspoon of pepper
Dish 2: 1 egg, beaten
Dish 3: 1 heavy cup coconut flakes plus 1/2 cup finely chopped pecans

DSC_1350

MAKE OR BREAK TIP: Adding the salt and pepper to the flour ensures that the flavor is close to the chicken and doesn’t get lost in the breading. Follow this rule any time you’re breading meat, especially with coarser coatings like this one!

Next, prep your chicken. I tend to buy the store brand of chicken breast, and they are HUGE, so I cut one of those babies in half to make two better portioned pieces. Cut two large breasts in half to make four pieces and then get a few tablespoons of canola oil in a large skillet over medium heat. Coat the chicken first in the flour (shake off excess), then the egg, and finally the coconut. You’ll really need to use your hands to coat the chicken thoroughly. Lay each piece carefully in the pan and allow to brown on both sides. (About 2 minutes or so per side.)

DSC_1351

Once the chicken is browned, put the pieces in a glass baking dish, sprinkle with some additional coconut (1/4 cup or so) and bake for 20-25 minutes. (Conveniently, that should be about the time you’re finishing up everything else.)

Next, you’ll need to get your pina colada glaze reducing. In a small saucepan, combine 1 cup pineapple juice, 1/4 cup cream of coconut, 3 tablespoons sugar, 1/2 tsp salt, 1/4 cup coconut flakes, and 2 ounces of crushed pineapple (1/4 of an 8 oz can). Stir well and keep over high heat, allowing it to boil and then reduce down while you’re making the rice.

KITCHEN TIP: You can find cream of coconut in most liquor stores, or in the section of your grocery store where they sell drink mixers. As my loyal readers know, I’m a bit of an amateur mixologist, so I always have some on hand for when I make tropical drinks!

DSC_1354

I use regular old Uncle Ben’s white rice, which takes about 20 minutes to cook. Put 1 cup of rice and 2 cups of water in a medium saucepan, allow to boil, then cover and reduce heat to low to allow the water to soak into the rice while it cooks. (Otherwise, follow the directions for whatever kind of rice you use.) Once the rice is going, you can work on the rest of the components to make the rice super delish. 🙂

I call it Hawaiian rice, but really, it’s essentially just fried rice with some minor changes… I gave a recipe for excellent fried rice in my Slow Cooker Teriyaki Chicken recipe, but since this is a bit different, here’s a refresher:

Dice 1/4 of a sweet onion and 1/2 a green (or red, or yellow, or orange…) pepper. Put these in a skillet over medium high heat with a few tablespoons of oil. (I just washed the pan I used for the chicken and used that one – less dishes later!) Once these have sweated for about a minute or so, add 3/4 cup frozen peas, stir to distribute, and allow to cook for 4-5 minutes. Just before it’s done, add 1 clove of minced garlic.

DSC_1352

KITCHEN TIP: Buy your peppers in bulk and prep them once your home – I usually like to julienne some and dice the rest. Put them into separate Ziploc freezer bags, labeled with the date, and freeze them! They’ll be good for up to 6 months, and then you can just take out what you need.

Once the veggies are cooked, push them to the side and pan-scramble one egg in the empty space of the pan. It’s not going to look super appetizing, since it’s going to pick up the oils and juices from the vegetables, but don’t worry. The brown stuff is packed with flavor!

DSC_1353

Once the egg is cooked, mix it in with the rest of the vegetables. Add your cooked rice, 1 tsp salt, 1 tsp pepper, and 1 tsp ground ginger, along with 6 ounces of crushed pineapple (the rest of the can you opened earlier for the glaze) and 2 tablespoons each of soy sauce and teriyaki sauce. Stir this all together until combined and then remove from the heat.

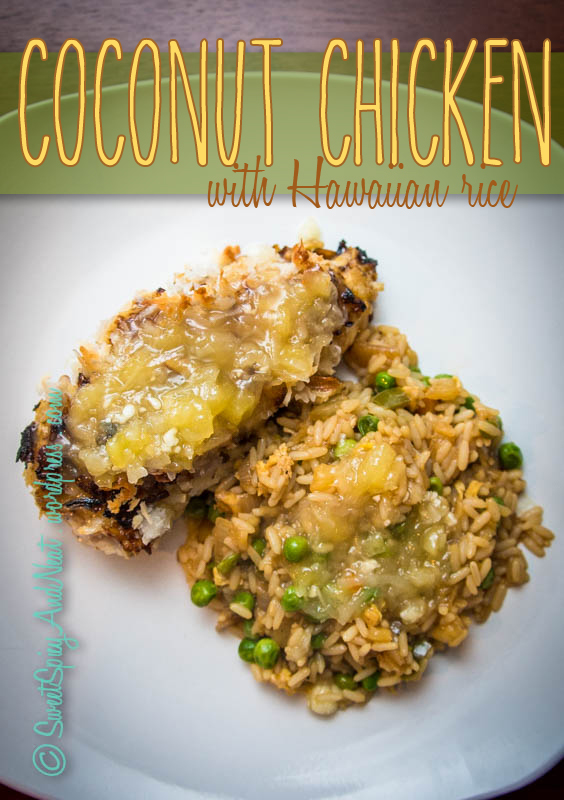
By the time your chicken is done, your glaze should have reduced nicely. Take the glaze off the heat and get the chicken out of the oven. You’re ready to plate and serve! Top the chicken with the glaze and serve immediately. (You could also double the glaze recipe and add it to the rice, too!)

DSC_1363

I’m not responsible for when this dinner disappears faster than you can blink! Once you get the process down, it works like a well-oiled machine, and I’m sure this will become a staple dinner for your house!

Full recipe:

Coconut Chicken with Pina Colada Glaze and Hawaiian Rice

Yield: 4 servings

Chicken:

2 large chicken breasts, cut in half to make 4 pieces
2 tbsp flour
1 tsp salt
1/2 tsp pepper
1 egg, beaten
1 heavy cup coconut flakes, plus more for sprinkling
1/2 cup finely chopped pecans
3 tbsp canola oil, for the pan

Glaze:

1 cup pineapple juice
1/4 cup cream of coconut
3 tbsp sugar
2 ounces crushed pineapple
1/4 cup coconut flakes
1/2 tsp salt

Rice:

1 cup regular white rice
2 cups water
2 tbsp canola oil, for the pan
1/4 onion, diced
1/2 green pepper, diced
3/4 cup frozen peas
1 clove garlic, minced
1 egg
6 ounces crushed pineapple
1 tsp salt
1 tsp pepper
1 tsp ground ginger
2 tbsp soy sauce
2 tbsp teriyaki sauce

Process:

1) Preheat oven to 350 degrees. Prepare breading assembly line by combining flour, salt, and pepper in first dish, beaten egg in second dish, and coconut and pecans in third dish.

2) Coat a large skillet in canola oil and put over medium heat. Bread the chicken by coating first in flour, making sure to shake off the excess, then the egg, and finally the coconut. Use your hands to ensure the chicken is well coated in coconut and then lay each piece carefully into the pan. Brown on each side for about 2 minutes, then transfer to a glass baking dish, top with additional coconut, and bake for 20-25 minutes or until cooked through.

3) In a small saucepan, combine pineapple juice, cream of coconut, sugar, crushed pineapple, coconut flakes, and salt. Stir to combine and bring to boil over high heat and then allow to reduce.

4) In a medium saucepan, add rice and water. Bring to a boil and then cover and reduce heat to low, allowing rice to cook through until all the water is gone.

5) In large skillet, heat canola oil over medium high heat and add onion and pepper, allowing to sweat for a minute before adding frozen peas. Let this cook for 4-5 minutes, then add garlic and cook for one additional minute.

6) Push the vegetables to the side of the pan and pan scramble an egg in the open space, then stir into the vegetables.

7) Once the rice is done, add to the vegetables, along with pineapple, salt, pepper, ginger, soy sauce, and teriyaki sauce. Stir to combine and then remove from heat until ready to serve.

8) After chicken is done baking, remove from oven and plate with the rice. Top chicken with glaze and serve!

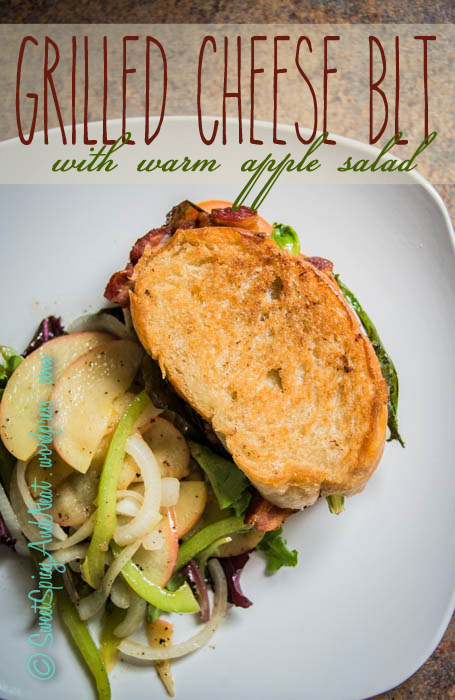
Grilled Cheese BLT with Warm Apple Salad

So the classic sandwich of winter is the Grilled Cheese, and the classic sandwich of summer is the BLT. It’s now March, and spring is at least trying to get here, so BAM, here’s a hybrid of the two that is a sandwich that is sure to impress!

I’ve also included a great side to go with it, and it is ALL done in ONE pan. (Always makes it better!)

DSC_7403text

Of course, the best part is the bacon – at least for me – so start by cutting two pieces of bacon in half and frying them up until they’re crispy. Place them on a paper towel to drain while you cook the rest of the sandwich.

Now, sandwich making is an art. (Women-in-the-kitchen jokes aside.) There’s a certain way that is optimal for layering and ensuring every bite is the same, so pay close attention!

Slice two pieces of Italian bread and butter one side of each. Sprinkle salt, pepper, and thyme on both.

DSC_7395

I used fresh thyme because I happened to have some on hand, but dried would do fine as well!

Next, add a few slices of extra sharp cheddar cheese and then your reserved bacon slices.

DSC_7396

My favorite brand of cheddar is Cabot – it’s super sharp and tastes fabulous!!

Next comes the lettuce. Any kind will do, but I feel like this sandwich is classy enough for spring greens:

DSC_7397

Then comes tomato slices and julienned onion:

DSC_7398

And finally, top with some more cheese before capping the sandwich with the other piece of bread. Make sure the buttered side is INSIDE the sandwich on both slices!

DSC_7399

The cheese goes on the outside so that it melts and creates a “glue” that holds the sandwich together. The tomatoes and lettuce are in the middle to keep them farther from the heat, and the lettuce goes between the tomatoes and bacon to ensure the wetness of the tomatoes doesn’t make the bacon soggy!

Now here comes the awesome part… put the heat back on the pan that still has your bacon fat in it, on medium-low, and then carefully place your sandwich right into the bacon fat. Let it cook for just a minute or two, enough to crisp up the bread and melt the cheese, and then turn it over and do the same to the other side.

Remove it from the pan and plate it along with some more spring greens, then turn the heat in the pan up to medium-high and add 1/2 an apple (sliced) along with some julienned onion and pepper. Squeeze in some lemon juice, sprinkle with fresh cracked pepper, and toss to coat.

DSC_7400

The goal is to brown the apples, onions, and peppers quickly so that they still retain some of their crunch. Once they’ve cooked for a minute or two, plate them on top of the spring greens and enjoy your fabulous spring dish!

DSC_7407

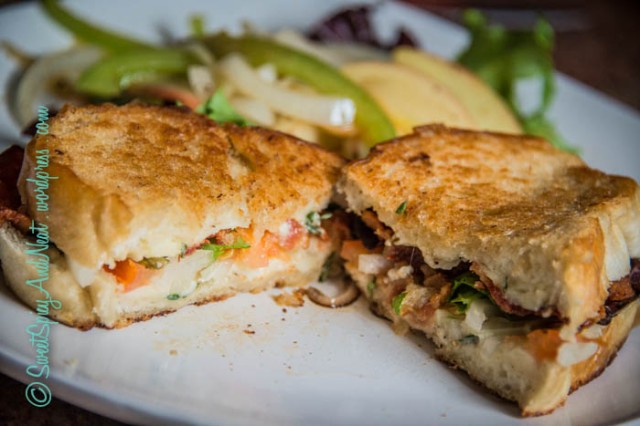
I’m still a little kid inside and like to have my sandwiches cut in half… but it also does a great job of showing the layers inside and how delicious this thing really is!

DSC_7412

Full Recipe:

Grilled Cheese BLT

Yield: 1 sandwich

Ingredients:

2 slices Italian bread
Butter/salt/pepper/thyme (to taste)
4-6 slices sharp cheddar cheese
2 slices of bacon
3 slices of fresh tomato
1 thin slice of an onion, broken apart
A small handful of spring greens

Process:

1) Cut the two slices of bacon in half and cook them in a frying pan until crisp. Set aside on a paper towel to drain.

2) Butter one side of each of the 2 slices of Italian bread and add salt, pepper, and thyme to the buttered sides.

3) Place one slice of bread, buttered side up, on your work surface and then layer the ingredients as follows: half the cheese slices, the bacon pieces, the spring greens, the tomato, the onion, and finally the other half of the cheese slices, before capping with the other half of the bread (buttered side down).

4) Put a medium-low heat under the same pan that you cooked the bacon in and carefully place the sandwich directly in the bacon fat. Allow to cook for just a minute or two, until browned, and then flip and cook for an additional minute. Serve immediately.
Skillet Chicken with White Wine Cranberry Glaze

I often have occasions where I stare into my pantry/fridge and I see a couple of different things and think, “Hm, I wonder if I could make this work together…”

Perhaps I just watch Chopped too much, but this dish was born out of that type of experience. I knew I had chicken in the fridge and dried cranberries in the pantry, so I got to thinking, “What if…” and thus, this dish was born. And boy, was it delicious.

DSC_7276

Bonus, I’ll also include a recipe at the bottom for that amazing spicy and sweet succotash you see with the chicken. 😉

Preheat the oven to 350. Add a tablespoon of olive oil to a skillet and heat over medium-low. While the pan is heating, sprinkle both sides of two chicken breasts with salt, pepper, oregano, cilantro, and thyme, then add them to the pan.

DSC_7253

Let them cook for about 5 minutes, then flip and cook for an additional 5 minutes. While they are cooking, roughly chop about 1/4 cup of pecans and spread them out on a small baking sheet. Then dice 1/4 of an onion and mince 1 clove of garlic.

Once the chicken has browned on both sides, put it in a baking pan coated with non-stick cooking spray and allow to bake while you prep the sauce. (About 15 total minutes in the oven should do it.) You can also put the chopped pecans in the oven now – just remember to take them out after about 5 minutes.

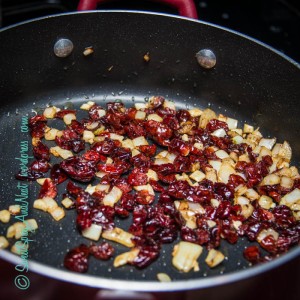
In the same pan that you cooked the chicken (still over medium-low heat), add your diced onion and toss to coat in the remaining olive oil. Allow these to saute for a few minutes, then add the minced garlic and about 1/2 cup of dried cranberries.

DSC_7257

Toss to combine and allow to simmer for another two minutes or so, then add 1/2 cup dry white wine to the pan. Allow this to reduce down (3-5 minutes) and then add 2 tablespoons of mascarpone cheese and 1 tablespoon of butter. Stir this in until it melts, leave on the heat for one more minute, and then remove from the heat.

DSC_7261

Plate your chicken once it’s cooked through and top with the glaze and a handful of chopped pecans. Serve with the spicy-sweet succotash listed below!

DSC_7272

Recipes:

Skillet Chicken with White Wine Cranberry Glaze

Yield: 2 servings

Ingredients:

2 boneless skinless chicken breasts
1 tbsp olive oil
Salt, pepper, cilantro, oregano, thyme (to taste)
1/4 cup pecans, roughly chopped
1/4 onion, diced
1 clove garlic, minced
1/2 cup dried cranberries
1/2 cup dry white wine
2 tbsp mascarpone cheese
1 tbsp butter

Process:

1) Preheat oven to 350. Heat 1 tbsp of olive oil in a skillet over medium-low heat.

2) Sprinkle both sides of chicken with salt, pepper, cilantro, oregano, and thyme, then place in the heated oil. Cook for 5 minutes per side, then place in a baking dish coated with nonstick spray and bake for 15 minutes. Put the pecans on a small baking sheet and also put these in the oven – bake for 5 minutes.

3) In the same pan used for the chicken (still over medium-low heat) add the onions. Toss and saute for about 3 minutes, then add the garlic and cranberries. Saute for another 2 minutes or so, then add wine and allow to reduce for about 3-5 minutes.

4) Add the mascarpone and butter to the pan and stir until they’ve melted. Remove from the heat after an additional minute.

5) Plate chicken and top with glaze. Sprinkle with toasted pecans. Serve immediately.

Spicy-Sweet Succotash

Yield: 2 servings

Ingredients:

1 & 1/2 cups water
3/4 cup frozen corn
3/4 cup frozen lima beans
1/4 cup dried cranberries
2 tbsp butter
1 tbsp sugar
Salt, pepper, cilantro, cayenne, to taste

Process:

1) Add frozen corn and lima beans with water to a medium saucepan. Bring to a boil, then reduce to a simmer and cook for 7 minutes.

2) After the initial 7 minutes, add the cranberries to the water and cook for an additional minute or two.

3) Drain, then put the succotash back in the sauce pan over low heat and stir in butter, sugar, and spices. (The more cayenne you add, the spicier it will be. A safe bet to not be overwhelming is about 1/4 tsp.) Serve immediately.

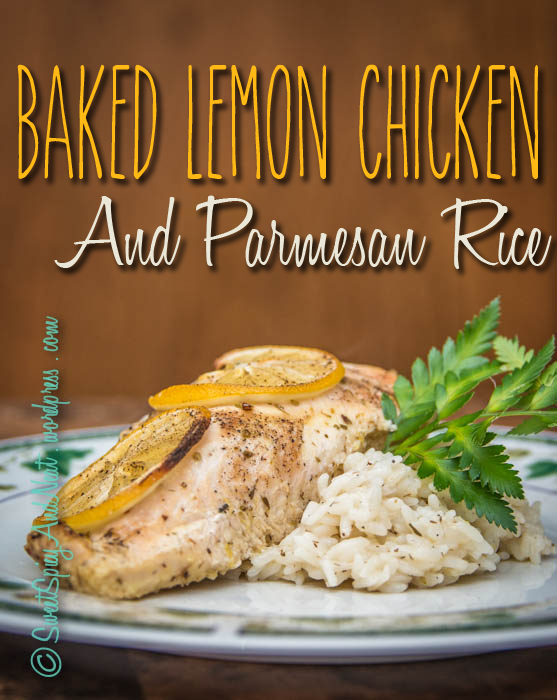
Baked Lemon Chicken with Parmesan Rice

So remember the Lemon Coconut Cookies and how I hadn’t figured out a “real meal” to use all those lemons?

Yeah. I figured one out. And it is AMAZING.

And it’s seriously SO easy!! Like really, it looks all fancy and stuff but it’s almost as simple as a crockpot dinner. Not even kidding.

Finished Text

Start by getting a marinade together for your chicken. I used the juice of a whole lemon and the zest of half of it (I saved the other half of the zest for the rice), 1/4 cup olive oil, 1/2 cup orange juice (or any citrus juice you have on hand, really), two smashed cloves of garlic, 1 tsp each of oregano, thyme, and crushed rosemary, and a 1/2 tsp of crushed red pepper, just for a little kick.

MAKE OR BREAK TIP: Put this all in a plastic bag, add your chicken, and seal the bag. Use your hands to make sure it’s all distributed, and then pop it in the fridge for at least an hour. Using a plastic bag means you need less marinade to cover the meat, and it’s much easier clean up and takes up WAY less space in the fridge!

Bag Marinade

This recipe serves four, and I used two large chicken breasts cut in half. You could also do four of the kind that are already sliced thinner (like Perdue “Perfect Portions”) – but basically, just make sure there’s four pieces of meat that are each reasonably sized for one person.

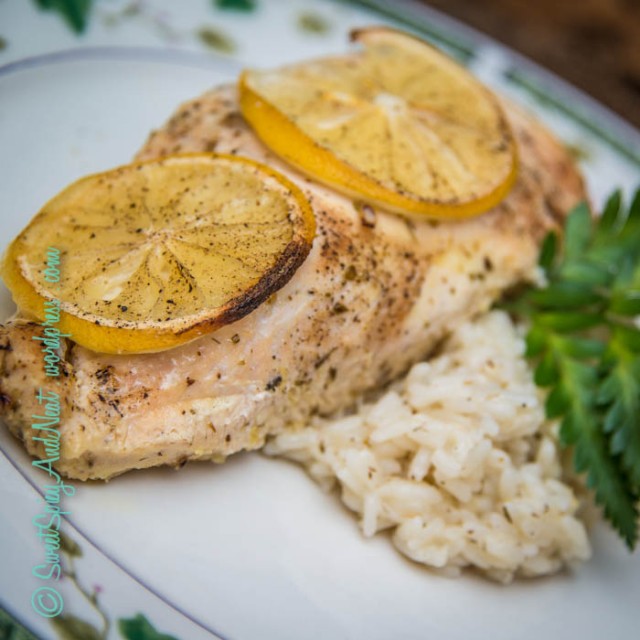
After your chicken has marinated for a while, preheat your oven to 400 degrees. Prepare a baking pan by coating it with about a tablespoon of olive oil, and take another lemon and slice 8 thin (1/4 inch or so) slices. Place the chicken in the pan (discard the marinade), sprinkle with salt and pepper, and then put 2 lemon slices on each piece of chicken.

Chicken in pan

Bake for 40-50 minutes or until chicken is cooked through.

As for the rice, when you have about 15-20 minutes left to go on your chicken cooking time, go ahead and put 1 cup of uncooked white rice, 1 cup of water, and 1 cup of milk into a sauce pan. Bring it to a boil, add your leftover lemon zest from earlier, the juice of whatever was left of the lemon you used for your slices on the chicken, and a tablespoon of salt. Reduce to a simmer, cover, and let the liquid absorb.

MAKE OR BREAK TIP: Using milk as part of your liquid to cook the rice makes it thicker and creamier! Remember that rice just needs a boiling liquid to cook in – it doesn’t necessarily have to be just water!

Once the rice is almost done, add another teaspoon of salt, a teaspoon of thyme, a teaspoon of oregano, and a 1/2 teaspoon of pepper. Stir these in, and then add 1/2 cup of Parmesan cheese. Stir this in until it has melted and then remove the rice from the heat.

Once your chicken is done, take it out of the oven and let it cool for just a minute.

Finished in Pan

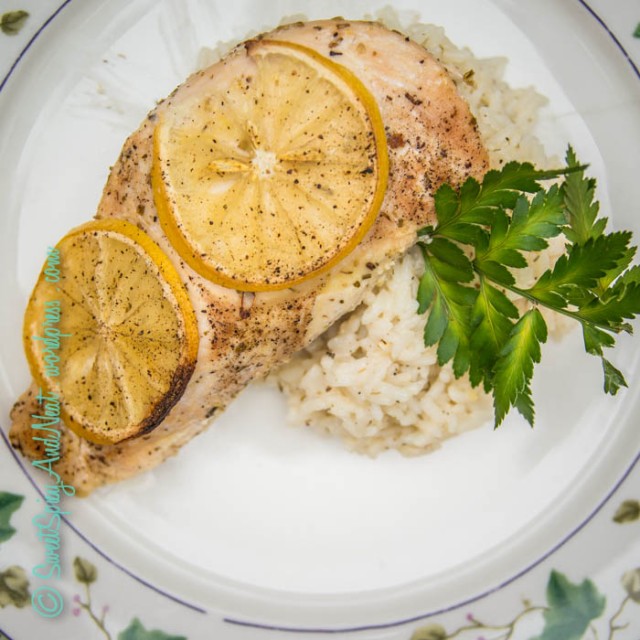
Spoon rice onto each plate, then use tongs to place a piece of chicken over each bed of rice. Serve immediately and enjoy!

Finished 2

This would really be super with some blanched green beans, or asparagus, or even a nice side salad, if you’re looking for something green to color it up! I just only had the energy for two dish components this time 😉

Finished 3

This will become a house favorite – I guarantee it!

Full Recipes:

Baked Lemon Chicken

Yield: 4 servings

Ingredients:

2 large chicken breasts, cut in half lengthwise
Juice of 1 lemon, zest of half of it
1/4 cup olive oil
1/2 cup orange juice
2 cloves garlic, peeled and smashed
1 tsp oregano
1 tsp thyme
1 tsp crushed rosemary
1/2 tsp crushed red pepper flakes
1 tbsp olive oil
Salt and pepper, to taste
8 thin lemon slices

Process:

1) In a plastic bag, combine lemon juice/zest, olive oil, juice, garlic, oregano, thyme, rosemary, and red pepper flakes. Add chicken, seal bag, and refrigerate for at least 1 hour.

2) Once the chicken has marinated, preheat oven to 400 degrees. Coat a baking pan with 1 tbsp olive oil.

3) Place chicken side by side in the pan. Sprinkle with salt and pepper, then top with lemon slices.

4) Bake for 40-50 minutes or until cooked through. Serve over rice.

And for the rice…

Lemon Parmesan Rice

Yield: 4 servings

Ingredients:

1 cup uncooked white rice
1 cup water
1 cup milk
1 tbsp salt
Zest & juice of 1/2 a lemon
1 tsp salt
1 tsp thyme
1 tsp oregano
1/2 tsp pepper
1/2 cup grated Parmesan cheese

Process:

1) Add rice, water, and milk to a saucepan. Bring to a boil.

2) Add 1 tbsp salt and lemon zest/juice. Cover, and let simmer until liquid is almost all absorbed.

3) Once rice is almost done, add 1 tsp salt, thyme, oregano, and pepper. Stir to combine, and then stir in Parmesan cheese. Serve immediately.

Honey Teriyaki Slow Cooker Chicken with Fried Rice

When you cook for large groups of people as often as I do, slow-cookers really do become your best friend. I swear. It’s like the greatest cooking tool ever invented.

My last visit to the slow cooker was to make last week’s amazing apple pulled pork. If you happened to miss that, seriously, go read it, and mark a day to make it. It’s the most popular post I’ve ever written, by a long shot!

This week, however, we’re paying homage to the other side of the world and tipping our hats to Asian cuisine, with a little bit of a twist. This requires almost no work at all, seriously, so there should be nothing keeping you from tackling this one!

Start by making your sauce right in the slow cooker itself. Dump in 1 cup teriyaki sauce, 1/4 cup brown sugar, 1/4 cup honey, 1 tsp garlic powder, 1 tsp ginger, 1 tsp thyme, and salt and pepper (about 1 tsp each). Use a whisk to combine it all (it may take a minute or two to fully break up the honey and dissolve the brown sugar).

Sauce

Take 3 boneless, skinless chicken breasts and cut them up into bite size pieces. As you cut each breast, put the pieces right into the slow cooker.

Chicken

Stir the chicken a little to ensure every piece is coated, put the lid on, set the slow cooker to low, and walk away for 4 hours.

After the time is up, the chicken should have darkened in color from absorbing the sauce. It should also be super tender and pretty much fall apart if you try to stab it with a fork. Use a slotted spoon to dish the chicken out, and then serve with fried rice (recipe below) or stir-fried veggies. (Tip, use the leftover sauce from the chicken to flavor your rice and/or veggies.)

Finished Dish

I have done several variations of cooking with this honey-teriyaki concept and this is by far the one that is the least work, but they are all delicious! When it gets warmer out, I’ll post the grilled version – it still has an Asian flair but is definitely much more home-town barbecue-esque!

Depending on the size of the breasts you use (the ones I used were fairly large), this should feed about 5-6 people, bearing in mind that it’s meant to be combined with rice or vegetables to make a full meal.

Full Recipe:

Honey Teriyaki Slow Cooker Chicken

Yields: 5-6 Servings when served with rice or vegetables.

Ingredients:

3 boneless skinless chicken breasts, cut into bite size pieces
1 cup teriyaki sauce
1/4 cup brown sugar
1/4 cup honey
1 tsp garlic powder
1 tsp ground ginger
1 tsp thyme
1 tsp salt
1 tsp pepper

Process:

1) Combine all ingredients except chicken in slow cooker; whisk to combine.

2) Add chicken to sauce in slow cooker. Put the lid on and cook on low for 4 hours or until chicken is cooked through and darkened in color.

3) Remove chicken from slow-cooker with a slotted spoon and serve with fried rice or vegetables.

For those interested, here’s a quick process on how I do my fried rice:

Yield: 5-6 servings

Ingredients:

2 cups uncooked rice
4 cups water
2 tbsp olive oil
1 tbsp salt

1 tbsp olive oil
1/2 green, orange, or yellow pepper, diced
1/2 medium onion, diced
2 cloves garlic, minced
2 eggs

If you are NOT using the teriyaki sauce from the chicken above, also:
1/2 tsp garlic
1/2 tsp ginger
1/2 tsp pepper
1/2 cup soy or teriyaki sauce, to taste
1 tsp toasted sesame seeds

Process:

1) In a large sauce pan, add the uncooked rice. Pour the water on top of the rice, add the olive oil and salt, and cover. Bring to a boil, then reduce the heat to the lowest setting and let simmer until all the water is absorbed. (15-20 minutes, typically.)

2) In a frying pan over medium-high heat, heat 1 tbsp olive oil and then quickly saute diced peppers and onions (3-5 minutes). Add the garlic and saute for an additional minute, then push veggies to the side of the pan.

3) Crack eggs directly into the empty half of the pan and quickly move them around to pan-scramble them (1-2 minutes).

4) Once veggies and eggs are done, add them to the rice and stir to combine.

5) Add seasoning elements (either remaning teriyaki sauce from above, or sauce elements listed in this recipe). Stir to combine and then serve immediately.

Roasted Red Potato Wedges

The Irish blood in me makes me a big fan of potatoes. I mean, a huge fan. Mashed, fried, roasted, grilled, doesn’t matter. When they’re done right, potatoes can be one of the most versatile staple foods ever.

And these roasted potato wedges are done all kinds of right.

This is just a little mini post to hold you over until tomorrow’s showstopper… 🙂 Start by getting your oven preheating to 400 degrees, and then get to work!

The great thing about potatoes is that usually it’s pretty easy to judge how many to use – one medium-large potato for every person you’re planning on serving. In my case, I used four and cut them into wedges. (You could also do cubes, or diced, but wedges work best with tomorrow’s dish!) Red potatoes are my favorite, but this would work with almost any kind.

Wedges

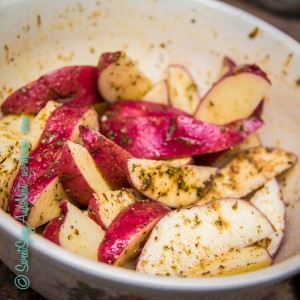
Put your wedges into a large bowl and pour about 1/4 cup of olive oil overtop, and then add spices. I used salt, pepper, garlic, oregano (about 1 tsp of each of those), parsley flakes (2 tsp) and then a dash or two of cayenne, for a little heat. Toss the potatoes with the oil and spices until they are coated. I do this by holding the bowl in my hands and jerking it upward in a circular motion so the potatoes “jump” out of the bowl and back in again, but if that sounds too risky to you, just use a large spoon!

Tossed Wedges

Prepare a baking sheet by laying a sheet of non-stick foil on it. (It HAS to be non-stick. Trust me, it will make life so much easier!) Lay the potatoes out on the foil, ensuring they are all laying on a cut side and not on a skin side. They should all be able to fit in one layer. If they don’t, find a bigger baking sheet, or use two.

Wedges on Sheet

Bake them for about 45 minutes or until they are starting to crisp at the edges and turn golden. That’s it! Super easy, and very little hands-on time. The hardest part is waiting for them to bake! Check back tomorrow for the ahh-maz-ing main course these potatoes and yesterday’s coleslaw are going to pair with!!

Fun fact, when the weather is warmer, these are great to do on the grill, also!

Full Recipe:

Roasted Potato Wedges

Yield: 4 Servings

Ingredients:

4 medium to large red potatoes
1/4 cup olive oil
1 tsp salt
1 tsp pepper
1 tsp garlic powder
1 tsp oregano
2 tsp parsley flakes
1/4 tsp cayenne pepper

Process:

1) Preheat oven to 400 degrees. Line a baking sheet with non-stick foil.

2) Cut potatoes into wedges. Each potato should make about 8-10 wedges.

3) Put wedges in a large bowl and dress with olive oil and spices. Toss to coat.

4) Lay wedges on prepared baking sheet, ensuring a cut side is facing down (and not the skin side) on each wedge.

5) Bake for 45 minutes or until edges are crispy and wedges are golden brown. They should be crispy on the outside and nice and fluffy on the inside!

Not Your Momma’s Coleslaw

I hate winter. Everything about it. The cold, the snow, the ice, the dry skin… About the only redeeming things of winter to me are the holidays (from Thanksgiving all the way through Valentine’s Day) and the extreme dip in the bug and spider population. (Especially this year, since at least around here, we’ve had far colder temps than normal!)

So, naturally, I spend every last frigid winter minute wishing for summer. And while I can’t replicate the hot, humid weather that demands the necessity for shorts and flip flops, I CAN still cook like it’s summer – even when it’s far too cold outside to even think about turning out the grill.

This post, and the two following it, are going to be a trifecta of summer lovin’. And by trifecta, I mean this one and the next one are going to be delicious, and the last one will be KNOCK your socks off AMAZING.

A summertime staple that seems to be an either-you-love-it-or-hate-it sort of dish is coleslaw. I grew up with an affinity to liking coleslaw, but I was always very picky about it. It was either REALLY GOOD, or not at all acceptable. Everyone’s opinion on what makes “really good” coleslaw seems to differ, but I’m going to go out on a limb here and say that this coleslaw will change whatever your opinion is of how the stringy, cabbage-y dish should taste. Forever. If this slaw doesn’t at least sort of tickle your taste buds, well… Color me shocked.

Final Dish 1

Any slaw is essentially comprised of a bunch of thinly cut or shredded vegetation, dressed in some sort of sauce. The choice of the vegetation and the base of the sauce are what really make a slaw into its final tasty creation. Personally, I’m a big fan of slaw with a crunch. If it feels mushy before I even chew it, well… To me that sort of sounds like baby food. Not particularly appetizing.

Most traditional coleslaw starts with cabbage. Though there are some variants that don’t use cabbage or lettuce at all, we’re staying traditional here (at least for now) and starting with cabbage. I used about 1/3 of a head and shredded it with a knife. This is fairly simple to do; just cut each wedge of the cabbage into thin strips with a large, sharp kitchen knife.

Next comes the crunchy bits! I used 2 carrots, half a large red onion, and a medium sized granny smith apple. (Yes, really, an apple. I swear, it makes it so delicious and makes all the difference in the world!) Each of these needs to be julienned to approximately equal sizes. A super easy way to do this is to use a mandolin to help you out:

Mandolin

The onion should end up being able to be pulled apart into fine enough strings after being sliced on the mandolin. For the apples and carrots, use the mandolin to make thin slices, and then use a kitchen knife to cut these slices into thin strips.

Just for fun, I also added in about 8 gherkin pickles (diced).

Toss the cabbage, pickles, and julienned carrots, apples, and onions into a large bowl and mix it up gently.

Vegetables

Set this aside and then make your dressing. I’m still staying somewhat traditional here and using a mayonnaise based sauce… I used 3/4 cup mayo, 1/4 cup apple cider vinegar, 1/4 cup brown sugar, 2 tbsp dijon mustard, 1/2 tsp garlic powder, and salt and pepper to taste. Put everything in a small bowl and stir until smooth.

Dressing

Pour this right overtop of your veggies and use tongs to toss it all together. Serve immediately, or keep refrigerated until it’s time to eat!

Finished Dish 2

This is fabulous all by itself, of course, but stay tuned for an even more delicious way to enjoy it… 🙂

Full Recipe:

Not Your Momma’s Coleslaw

Yield: 6-8 servings

Ingredients:

Slaw:
1/3 head cabbage
2 carrots, peeled and julienned
1 granny smith apple, cored and julienned
1/2 large red onion, peeled and julienned
8 Gherkin pickles, diced

Dressing:
3/4 cup mayonnaise
1/4 cup apple cider vinegar
1/4 cup brown sugar
2 tbsp dijon mustard
1/2 tsp garlic powder
Salt & Pepper, to taste

Process:

1) Combine cabbage, carrots, apples, onions, and pickles in a large bowl.

2) In a small bowl, stir together mayonnaise, vinegar, brown sugar, mustard, garlic powder, salt, and pepper until well blended.

3) Pour dressing over slaw and toss to combine. Serve immediately or refrigerate until ready to serve.