Teriyaki Bacon Burgers

Summer is coming! I can feel it! And for me, summer means one thing: GRILLING!

There is no more classic grilled food, in my humble opinion, than the good old beef burger. This one will seriously tingle your taste buds, because it puts all the good stuff INSIDE the burger, instead of piled on top.

Teriyaki Bacon Burgers

You’ll want to start by dicing 1/4 of a medium sweet onion (very small dice!) and cooking up 4 slices of bacon. Once the bacon is cooked and cooled, break it into small pieces.

Then, in a medium bowl, add a little over a pound of ground beef. (Generally, I see them in the store packed in 1.25-1.40 pound packages.) Personally, I like to use 93% lean beef. It’s a bit more expensive, but the burgers don’t shrink as much! If you use 85% or 73%, just bear in mind that there will be a fair bit of shrinkage to your patties once they start cooking!

To the ground beef, add your cooked bacon pieces, the diced onion, 1/3 cup teriyaki sauce, and hefty sprinklings of the following: salt, pepper, garlic powder, ground ginger, and if you’ve got it, your favorite dry steak seasoning. (I use Montreal Style Steak, which is made by McCormick.) If you’d like a little heat, sprinkle in either some chili powder or some cayenne.

Teriyaki Bacon Burgers

Combine it all together with your hands. DON’T OVERWORK THE MEAT. Work it until everything is well distributed, and then stop! If you work it too much, the burgers will be tough – no bueno! Once it’s well combined, make it into four patties. They’ll be pretty big – that’s okay! Remember they will shrink!

Teriyaki Bacon Burgers

To prep your grill, spray with with cooking spray and turn the heat to medium high. (Or equivalent process for a charcoal grill. Mine is gas – I know, I cheat!) Let it warm up for a few minutes, then put the burgers on! They should sizzle when they hit the grates. Cook to your desired level of done-ness, flipping halfway through. I like my burger pink inside because it’s super tender and juicy that way, so that should be about 5 minutes per side for burgers of this size. If desired, after you’ve flipped them and they are almost done, top with mozzarella cheese! Serve them on a toasted bun with whatever condiments you prefer. I LOVE barbecue sauce on my burgers. If you’ve never tried it, you should. It’s especially good with these!

Teriyaki Bacon Burgers

I made a salad ahead of time to serve with the burgers – the freshness of the veggies in the salad is a great compliment to the savory burgers! (Plus it’s far better for you than a side of fries or chips!) Full Recipe:

Teriyaki Bacon Burgers

Yield: 4 burgers

Ingredients:

4 pieces bacon, cooked and crumbled
1/4 sweet onion, small dice
1 & 1/3 (ish) pounds lean ground beef
1/3 cup teriyaki sauce
To taste: salt, pepper, garlic powder, ground ginger, steak seasoning, cayenne (optional)

1/2 cup shredded mozzarella cheese (if desired)

4 hamburger buns, plus condiments, for serving.

Process:

1) In medium bowl, combine ground beef with cooked bacon, diced onion, teriyaki sauce, and spices. Work with your hands until just combined. DO NOT OVERWORK MEAT.

2) Form into four equal size patties.

3) Spray grill with cooking spray and heat to medium-high. Place burgers directly on grates and let cook for 4-5 minutes per side (medium), or until desired temperature is reached.

4) When only a minute or so of cooking time remains, top with mozzarella cheese, allow to melt, and then serve burgers as desired. (Try them with barbecue sauce!)

Pasta with Lemon Pepper Parmesan Cream Sauce

Holy wow you guys. I sort of… accidentally made this one day for lunch. (Yes, really, “accidentally.”) It turned out so awesome that I tweaked it a bit and adjusted the recipe to serve four people. This is a fabulous quick and easy dinner or lunch idea, and is definitely versatile!

DSC_1438text

For a lighter dish, this would be good without any meat at all. However, to make it a little heartier, saute up your choice of protein to go into the pasta. I chose kielbasa, which everyone knows is my favorite, but any smoked sausage would do. You could also use chicken (2 large breasts cut into bite size pieces), or even ground turkey (about a pound). The main point is just that the meat is fully cooked before anything else goes into the pan.

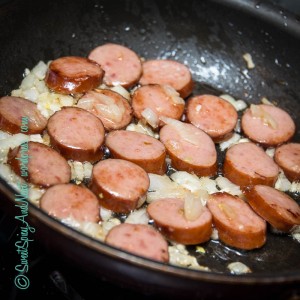
In my case, since I used kielbasa, my meat was already cooked through. I just browned it in the pan with some olive oil for a few minutes, then added 1 diced sweet onion. (Sweet onions are pretty small, so using a whole one shouldn’t be overpowering.)

DSC_1435

Let those sweat on medium-high for about two minutes, then add in 3 cloves of minced garlic and let simmer for one more minute.

Then, keeping the heat fairly high, add in the juice and zest of a large lemon, 3/4 cup of half & half, and 1/2 cup shredded Parmesan cheese. Quickly stir this together so it combines and the cheese starts to melt, and then let it reduce for about two minutes.

DSC_1436

While it’s reducing, add in two teaspoons of fresh cracked pepper, and then salt and basil to taste. (I didn’t need as much salt since I used a cured meat – it’s to your taste!) Once the sauce has thickened, add 1 pint of halved cherry tomatoes. Stir these in and then remove the pan from the heat.
Add the sauce to cooked pasta of your choice, top with more shredded Parmesan, and serve! I used penne pasta for mine.

DSC_1439

I’m of the opinion that anything with a lemon-pepper flair is amazing, but I’m telling you, this pasta is shockingly good! And it’s totally fancy enough to entertain with. 🙂

Full Recipe:

Pasta with Lemon Pepper Parmesan Cream Sauce

Yield: 4 servings

Ingredients:

1 package of kielbasa, cut into coins (or enough of your choice of meat to serve 4)
1 small sweet onion, diced
3 cloves garlic, minced
Zest & juice of 1 lemon
3/4 cup half & half
1/2 cup grated Parmesan cheese, plus more for topping
2 teaspoons fresh cracked black pepper
Salt & Basil, to taste
1 pint cherry tomatoes, halved

Process:

1) Brown kielbasa with olive oil in a skillet over medium-high heat for about 3 minutes, tossing occasionally. Add sweet onion and saute for another two minutes. Finish off with garlic and let simmer for one final minute.

2) Keeping pan over medium-high heat, add juice and zest of the lemon, half & half, and Parmesan cheese. Stir to combine and let reduce for about 2 minutes.

3) While sauce is reducing, add pepper, salt, and basil, and stir in.

4) Once sauce has thickened, stir in cherry tomatoes and remove from the heat.

5) Toss a cooked pasta of your choice with the sauce, plate, and top with Parmesan cheese before serving.

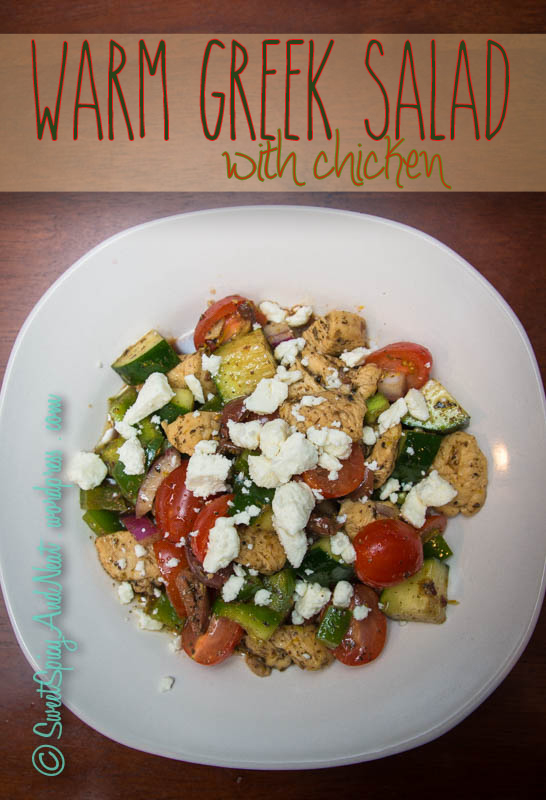
Warm Greek Salad with Chicken

I’m pretty convinced that everything good in the world comes from the Mediterranean region. As my loyal readers know, Tuscany is probably my favorite place on the planet, as I illustrated in my most pinned and most popular blog post ever, Tuscan Pasta in Lemon Blush Sauce. (Guys, it’s been pinned 142 times as of today. That’s a LOT for a small town girl like me!)
But I digress.

A place I have yet to visit in the world (but is TOTALLY on my bucket list!) is Greece. Not only is that a country steeped to the bursting in history and rich culture, but their food is known for being natural and wholesome. The Greeks are not at all fans of processed food – most McDonald’s that have tried to open there have ended up closing. Because of this, it’s naturally the ideal kind of cuisine for someone like me.
So, I’m sure a lot of you frequently visit Panera or some other establishment that serves a “Greek Salad.” Usually, it’s mixed greens with some olives, peppers, and feta tossed on top. Now don’t get me wrong – I will tear up a Greek salad from Panera Bread if I’m waiting to meet a client there. But did you know, the classic “Greek” salad actually has no lettuce at all?

Yup, that’s right. It’s a tomato and cucumber based salad, tossed with red onion, green pepper, kalamata olives, and feta cheese, and dressed with an olive oil vinaigrette.

Mouth watering yet? Yeah, mine too.

Read on my for my take on the classic Greek salad – warmed up with sautéed chicken!

DSC_1397text

Mise en place – French for “everything in its place,” or doing all of your prepwork before you start cooking – is so important for this dish! The only thing you have to cook is the chicken, and that goes so fast that you’ll need to have everything else ready beforehand!

So, get yourself your favorite large cutting board (my father made mine for me, crafty gentleman that he is) and prep the following:

One pint cherry tomatoes, halved.

One cucumber, large dice.

One green pepper, small dice.

Half a red onion, small dice.

About 40 (ish) kalamata olives, pitted and roughly chopped.

Three cloves garlic, minced.

DSC_1394

MAKE OR BREAK TIP: Kalamata olives typically come with the pits still in them. To get them out, crush the olive under the side of a chef’s knife (sort of like how you’d smash a clove of garlic to peel it) until it smashes down and the skin breaks, then pull the pit out with your fingers. It’s a little tedious, but once you get a rhythm, it’s not so bad.

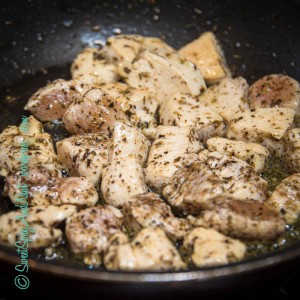
Once this is all done, cube two large chicken breasts into bite sized pieces. Put a couple tablespoons of olive oil in a skillet over medium heat, and once the pan is hot, add the chicken and season liberally with salt, pepper, oregano, and basil. Toss to coat and let simmer for five minutes or so, tossing occasionally. When it’s just about done, add your minced garlic, toss to combine, and cook for one additional minute.

DSC_1395

While the chicken is cooking, make your dressing by whisking together the zest and juice of one lemon, 3 tbsp extra virgin olive oil (the really good stuff!), 3 tbsp balsamic vinegar, and 1 tsp each of salt, pepper, oregano, and basil. I know it doesn’t look like a lot, but I promise, you only want a light coating of dressing!

Once the dressing is done, add your prepped veggies to a large bowl and pour the dressing overtop. As soon as the chicken/garlic is finished cooking, get it off the heat and immediately into the bowl. Toss it all together so the heat from the chicken warms up the vegetables a bit, and then dish it out and top with crumbled feta cheese!

DSC_1399

We eat with our eyes before we ever taste with our tongues, and I have to say, the colors in this dish make it look SO appetizing – and the flavors packed into it don’t disappoint!

Alternatively, you could of course make this into a vegetarian dish by removing the chicken. (Removing the chicken also turns it into a super awesome side dish, especially for summer!)

Full Recipe:

Warm Greek Salad with Chicken

Yield: 4 servings

Ingredients:

1 pint cherry tomatoes, halved
1 cucumber, large dice
1 green pepper, small dice
1/2 red onion, small dice
Approx 40 kalamata olives, pitted and roughly chopped
3 cloves garlic, minced
2 large chicken breasts, cubed into bite size pieces
Zest + juice of one lemon
3 tbsp extra virgin olive oil (plus more for sautéing chicken)
3 tbsp balsamic vinegar
4 ounces crumbled feta cheese
Salt, pepper, oregano, basil, to taste

Process:

1) Prep all vegetables first (tomatoes, cucumber, pepper, onion, and olives), putting them into a large bowl as you finish each one.

2) In a small bowl, whisk together lemon zest and juice, olive oil, balsamic vinegar, and 1 tsp each of salt, pepper, oregano, and basil. Add to vegetables.

3) Cube chicken and add to a heated skillet with 2 tbsp olive oil. Season liberally with salt, pepper, oregano, and basil. Toss occasionally and allow to cook for about five minutes, or until cooked through. Just before chicken is done, add minced garlic and toss to combine, allowing to cook for one additional minute.

4) Remove chicken from heat and immediately add to the vegetables. Stir to combine. Sprinkle with feta cheese after serving.

Grilled Cheese BLT with Warm Apple Salad

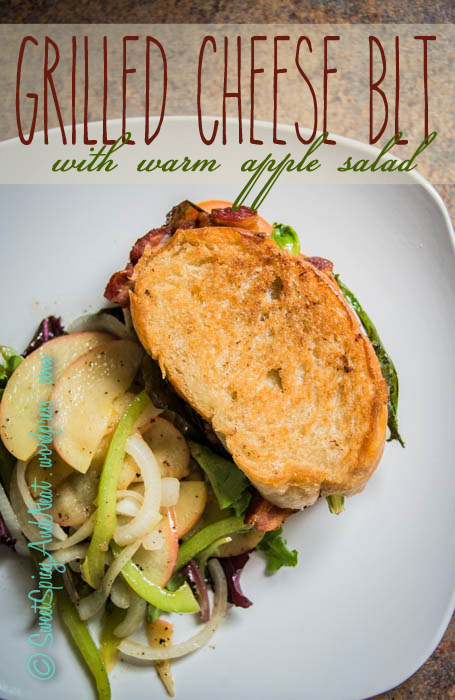
So the classic sandwich of winter is the Grilled Cheese, and the classic sandwich of summer is the BLT. It’s now March, and spring is at least trying to get here, so BAM, here’s a hybrid of the two that is a sandwich that is sure to impress!

I’ve also included a great side to go with it, and it is ALL done in ONE pan. (Always makes it better!)

DSC_7403text

Of course, the best part is the bacon – at least for me – so start by cutting two pieces of bacon in half and frying them up until they’re crispy. Place them on a paper towel to drain while you cook the rest of the sandwich.

Now, sandwich making is an art. (Women-in-the-kitchen jokes aside.) There’s a certain way that is optimal for layering and ensuring every bite is the same, so pay close attention!

Slice two pieces of Italian bread and butter one side of each. Sprinkle salt, pepper, and thyme on both.

DSC_7395

I used fresh thyme because I happened to have some on hand, but dried would do fine as well!

Next, add a few slices of extra sharp cheddar cheese and then your reserved bacon slices.

DSC_7396

My favorite brand of cheddar is Cabot – it’s super sharp and tastes fabulous!!

Next comes the lettuce. Any kind will do, but I feel like this sandwich is classy enough for spring greens:

DSC_7397

Then comes tomato slices and julienned onion:

DSC_7398

And finally, top with some more cheese before capping the sandwich with the other piece of bread. Make sure the buttered side is INSIDE the sandwich on both slices!

DSC_7399

The cheese goes on the outside so that it melts and creates a “glue” that holds the sandwich together. The tomatoes and lettuce are in the middle to keep them farther from the heat, and the lettuce goes between the tomatoes and bacon to ensure the wetness of the tomatoes doesn’t make the bacon soggy!

Now here comes the awesome part… put the heat back on the pan that still has your bacon fat in it, on medium-low, and then carefully place your sandwich right into the bacon fat. Let it cook for just a minute or two, enough to crisp up the bread and melt the cheese, and then turn it over and do the same to the other side.

Remove it from the pan and plate it along with some more spring greens, then turn the heat in the pan up to medium-high and add 1/2 an apple (sliced) along with some julienned onion and pepper. Squeeze in some lemon juice, sprinkle with fresh cracked pepper, and toss to coat.

DSC_7400

The goal is to brown the apples, onions, and peppers quickly so that they still retain some of their crunch. Once they’ve cooked for a minute or two, plate them on top of the spring greens and enjoy your fabulous spring dish!

DSC_7407

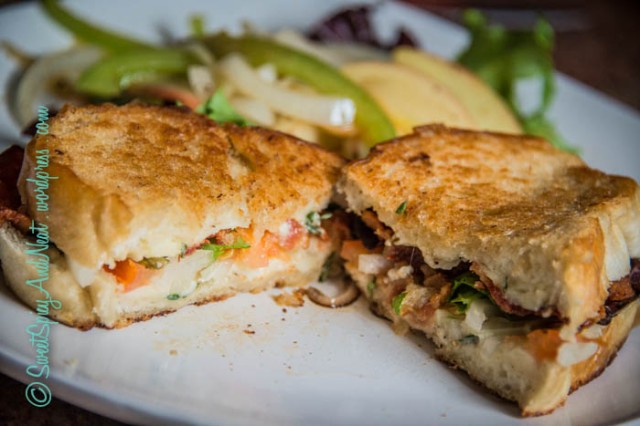
I’m still a little kid inside and like to have my sandwiches cut in half… but it also does a great job of showing the layers inside and how delicious this thing really is!

DSC_7412

Full Recipe:

Grilled Cheese BLT

Yield: 1 sandwich

Ingredients:

2 slices Italian bread
Butter/salt/pepper/thyme (to taste)
4-6 slices sharp cheddar cheese
2 slices of bacon
3 slices of fresh tomato
1 thin slice of an onion, broken apart
A small handful of spring greens

Process:

1) Cut the two slices of bacon in half and cook them in a frying pan until crisp. Set aside on a paper towel to drain.

2) Butter one side of each of the 2 slices of Italian bread and add salt, pepper, and thyme to the buttered sides.

3) Place one slice of bread, buttered side up, on your work surface and then layer the ingredients as follows: half the cheese slices, the bacon pieces, the spring greens, the tomato, the onion, and finally the other half of the cheese slices, before capping with the other half of the bread (buttered side down).

4) Put a medium-low heat under the same pan that you cooked the bacon in and carefully place the sandwich directly in the bacon fat. Allow to cook for just a minute or two, until browned, and then flip and cook for an additional minute. Serve immediately.

Grilled Chicken Cilantro Lime Salad

This is a fabulous summery dish that you can have really any time of year if you want to remind yourself of the crisp and sweet tastes of the warmer months! (I really needed that reminder since Old Man Winter keeps dropping snow on us!)

It uses a great combination of different flavors to provide a really great flavor profile for a great dish that’s good for a hearty lunch or a light dinner!

Finished Text

Start off by getting your spices together: in a small dish, combine the zest of 1 lime, and then 1/2 tsp each of salt, cilantro, and garlic powder, along with 1/4 tsp of black pepper and cayenne pepper.

DSC_7174

Coat a small frying pan in a couple teaspoons of olive oil and heat it over low heat. Take about 1/4 of your seasoning mix and rub it over one side of a chicken breast.

DSC_7175

Put this in your frying pan, seasoning side DOWN, and then add some more salt, pepper, and cilantro to the unseasoned side. Let this cook for about 5-8 minutes or until it’s started to brown, then turn the chicken over, cover, and cook for an additional 8 minutes or so, or until the chicken is cooked through.

DSC_7176

While the chicken is cooking you can prepare the salad. Roughly chop 1 romaine lettuce heart and add it to a medium-large bowl. Then, julienne 1 carrot, 1/2 an onion, and 1/2 an apple. (I used Gala to add some red color, but any crisp/tart variety would be fine!)

DSC_7177

Add these to your lettuce and toss them together. Then, to the dish of your remaining seasoning, add the juice of the lime you zested earlier, 2 tbsp of olive oil, and 1 tbsp of rice vinegar. Use a fork to whisk this together, then pour it over your salad and toss to combine. Dish the salad out into two bowls.

DSC_7179

Once your chicken is done and has cooled a bit, cut it into thin slices and then top each salad with equal amounts of chicken. Serve immediately!

DSC_7189

Full Recipe:

Grilled Chicken Cilantro Lime Salad

Yield: 2 servings

Ingredients:

Zest & juice of 1 lime
1/2 tsp salt
1/2 tsp cilantro
1/2 tsp garlic powder
1/4 tsp black pepper
1/4 tsp cayenne pepper
2 tbsp olive oil
1 tbsp rice vinegar

2 tsp olive oil
1 boneless skinless chicken breast

1 romaine lettuce heart, roughly chopped
1 carrot, julienned
1/2 onion, julienned
1/2 apple, julienned

Process:

1) In a small dish, combine lime zest, salt, cilantro, garlic powder, black pepper, and cayenne pepper.

2) Heat 2 tsp olive oil in a small skillet over low heat. Rub 1/4 of the seasoning mix onto one side of your chicken breast and place it seasoning side down into the skillet. Sprinkle unseasoned side with additional salt, pepper, and cilantro. Cook for 5-8 minutes, then turn and cover and cook for an additional 8 minutes or until cooked through. Set aside to cool.

3) Stir in 2 tbsp olive oil, 1 tbsp rice vinegar, and juice of 1 lime to your seasoning mix.

4) Combine lettuce, carrots, onions, and apples in a large bowl and toss together. Add dressing and toss to combine.

5) Plate salad in two separate dishes. Cut your chicken into thin slices and divide evenly between the two salads. Serve immediately.

Chicken & Pepper Mexican Rice

The other day I had an intense craving for chicken fajitas. Over the last year I have developed a real love for Mexican food, and fajitas are probably my favorite Mexican creation to make at home. I tore through my kitchen for the necessary ingredients and was disappointed to find that I had everything I needed – EXCEPT tortillas. Which are sort of the most necessary part of a fajita. Otherwise it’s just a pile of delicious chicken and vegetables.

*Bing.* Light bulb. It’s just a pile of delicious chicken and vegetables … until you add ANOTHER starch to it. And thus, the idea for this dish was born. All the goodness of fajitas, but on top of a bed of cilantro lime wild rice instead! This recipe serves two.

DSC_7167text

Wild rice takes a little longer to cook than regular white rice, so you’ll want to get the rice going first. In a small saucepan, add 1/2 cup wild rice and a 1 cup of water plus a couple more tablespoons. Put it over high heat and then add 1 tsp salt, 1/2 tsp pepper, the zest & juice of one lime, 1/2 tsp cilantro, and 1/2 tsp garlic powder. Once it comes to a boil, reduce the heat to low and cover until all the water is absorbed. (Wild rice takes 20-25 minutes or so to cook.)

While you’re waiting for your rice to cook, dice 1/4 of an onion and 1/4 of a green pepper and set them aside. Then take one chicken breast and slice it into thin pieces.

DSC_7150

When your rice is nearly done, heat 1 tbsp of oil in a medium frying pan over medium-high heat and then add your chicken to it. Spice the chicken by adding 1 tsp salt, 1/2 tsp pepper, 1 tsp cilantro, 1/2 tsp cayenne, and 1/2 tsp garlic powder. Toss to coat, and continue to toss occasionally to ensure even cooking.

DSC_7152

It should only take a few minutes to cook the chicken. Once it’s cooked through, add your diced onion and pepper, reduce heat to low, and cover.

DSC_7153

Allow this to simmer for a few more minutes to soften the onion and pepper, then uncover and add 1/2 cup of your preferred salsa. Stir this in, and then serve by plating the rice first between 2 plates and then dividing the chicken evenly between them on top of the rice. Garnish with shredded cheddar cheese and enjoy!

DSC_7160

Of course, you could always modify this by julienning the onions and peppers instead of dicing them and serving this all on nice flour tortillas with sour cream to make fajitas!

Full Recipe:

Chicken & Pepper Mexican Rice

Yield: 2 servings

Ingredients:

Rice:
1/2 cup uncooked wild rice
1 cup plus 2 tbsp water
Zest & juice of 1 lime
1 tsp salt
1 tsp cilantro
1/2 tsp black pepper
1/2 tsp garlic powder

Chicken:
1 large chicken breast, cut into thin slices
1 tbsp oil
1/4 onion, diced
1/4 green pepper, diced
1 tsp salt
1/2 tsp black pepper
1/2 tsp cayenne
1/2 tsp cilantro
1/2 tsp garlic powder

Shredded cheddar cheese, for garnish.

Process:

1) In a small sauce pan, combine all ingredients for rice over high heat and bring to a boil. Once the water is boiling, reduce heat to low, cover, and let simmer for 20-25 minutes or until water is cooked through.

2) In a medium frying pan over medium-high heat, add the oil and chicken. Season with spices listed and toss to coat, continuing to toss occasionally to ensure even cooking.

3) After about 3 minutes, once chicken is cooked through, add diced onion and pepper and cover. Let simmer for an additional 2-3 minutes.

4) Once onion and pepper have softened, uncover and stir in 1/2 cup salsa. Allow this to heat through for about a minute and then remove from heat. Plate the rice first and then add the chicken on top, and garnish with cheddar cheese. Serve immediately.

*Super Bowl Week* Puff Pastry Mini Pizzas

Okay, so far in Super Bowl week we’ve paid tribute to Mexico with the taco crescents and good ol’ America with the bacon cheeseburger sliders, so I think it’s time to tip the hat to the flavors of my favorite country, Italy!

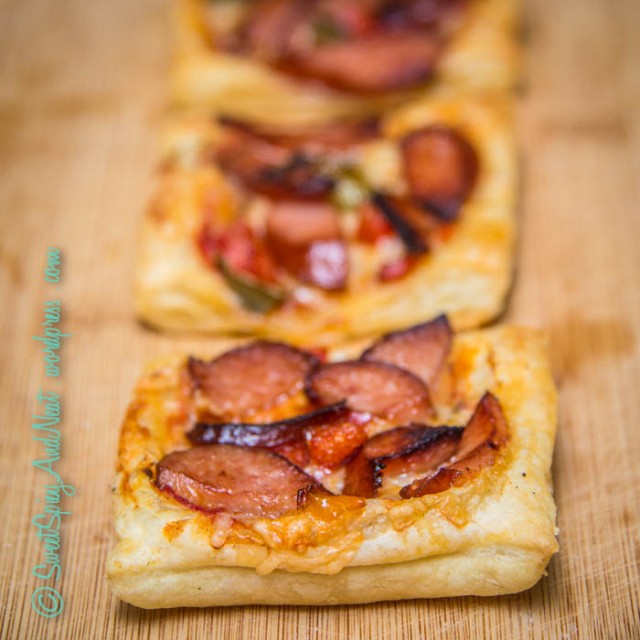
The classic combinations of tomato, basil, and mozzarella in these little beauties are definitely reminiscent of Italy, but I did put my own spin on it by using puff pastry and Kielbasa sausage! If you wanted to be more true to Italy in your meat choice, salami is extremely popular there!

Finished Text

Start off with two sheets of puff pastry (one package) and let them thaw out on the counter. (About 30-40 minutes.) Once they’re nearly thawed, preheat the oven to 400 degrees and line two baking sheets with parchment paper.

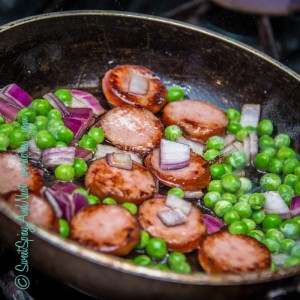
In a frying pan over medium-low heat, saute 1 diced green pepper and 1/2 package of kielbasa cut into small pieces, tossing occasionally, for about 3 minutes or until the sausage has started to brown. Set aside.

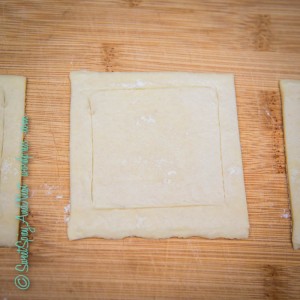
Take the thawed pastry sheets and cut each one into 9 equal squares. (18 total.) Lay them out on your prepared baking sheets, and then score a crust around the edge of each square.

Score

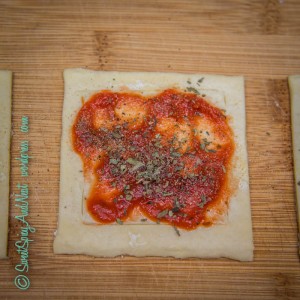
Doing your best to stay inside the scored square, spread about 1 tsp or so of tomato sauce onto the dough and then sprinkle with salt, pepper, basil, and garlic powder. (If you like things on the spicy side, add a touch of cayenne, too!)

Sauce

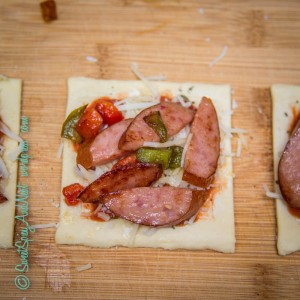
On top of the sauce, add about 1 tsp each of mozzarella and Parmesan cheese. Carefully add your sausage and pepper on top of the cheese, evenly distributing to all 18 pizzas.

Sausage

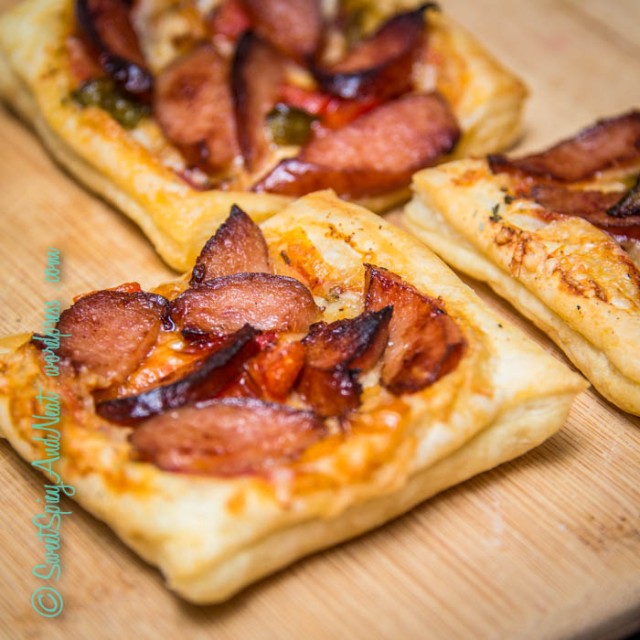
Once they are all assembled, bake for 12-15 minutes or until the pastry has puffed up and is golden brown. Remove from the oven and allow to cool for a minute or two and then serve!

Finished 2

These are absolutely delicious and packed with flavor, and the lightness of the puff pastry means they aren’t too heavy to go with anything else you might be serving!

Finished 3

The best part is that these are super flexible – you can top them with whatever you like! No matter what your culinary taste is, I’m sure there’s a million different ways you could make these to suit you!

Full Recipe:

Puff Pastry Mini Pizzas

Yield: 18 pizzas

Ingredients:

2 sheets puff pastry, thawed
1/2 (14oz) package of kielbasa, cut into small pieces
1 green pepper, diced
1/3 cup tomato sauce
Salt, pepper, basil, garlic powder, cayenne – all to taste.
1/3 cup mozzarella cheese
1/3 cup Parmesan cheese

Process:

1) Preheat the oven to 400 degrees and line two large baking sheets with parchment paper.

2) In a frying pan over medium-low heat, saute diced peppers and sausage for about 3 minutes or until sausage has begun to brown. Remove from heat and set aside.

3) Cut each sheet of puff pastry into 9 equal squares (18 total) and lay them on the baking sheets. Score a crust along the edges of each square.

4) Staying within the scored square, spread 1 tsp of tomato sauce onto each square and then sprinkle seasonings on to taste.

5) On top of the sauce, add mozzarella and Parmesan cheeses, about 1 tsp of each cheese per square.

6) Carefully add the sausage and peppers to the top of each pizza, distributing it evenly to all 18 pizzas.

7) Bake for 12-15 minutes or until crust is golden brown. Remove from oven, allow to cool for 1-2 minutes, and then serve immediately.

*Super Bowl Week* Bacon Cheeseburger Sliders

Burgers are one of the best “having people over for a casual get-together” foods, but let’s face it, on Game Day, people want a little of everything, and a big burger is just too much with everything else you have to eat!

Finished Text

That’s where sliders come in – little miniature burgers, PACKED with flavor, but not too heavy to eat! These sliders really deliver on flavor and they pack a little heat, too, so they are sure to be a crowd pleaser!

Finished 2

Start off by cooking 6 pieces of bacon (crispy) in a large skillet. (Cook more if you can’t resist the temptation to eat some!) A few minutes per side on a medium low heat should be enough. Set these aside on a paper towel to drain off the excess oil.

In a mixing bowl, put 1 pound of ground beef and add to it 1 tsp each of salt, garlic powder, onion powder, and oregano, and a 1/2 tsp of cayenne. Use your hands to combine this all together and then form the meat into 12 patties, about 3 inches wide.

Raw burgers

MAKE OR BREAK TIP: Don’t over-knead the meat! Get it just combined so all the spices are evenly distributed, and then STOP! Over-working the beef causes it to be tough, and nobody likes a tough burger! Use your palms to lightly squeeze each ball of meat so it becomes a flat patty – no extra pressure is needed!

Heat up the same pan you used for the bacon (don’t wipe out the grease!) over a medium heat and add the burger patties to it. It’s important that you don’t overcrowd the pan, so if they don’t all fit with an inch of space between them, do it in two batches. Cook on one side for 3-4 minutes, then flip and cook for an additional 2-3 minutes. (This much time should mean they are medium well to well-done.)

Cooking burgers

Just before they have finished cooking, add a slice of pepper jack cheese to each one. (If you buy the single-serving sliced kind, one of those slices should divide nicely into 4 squares that fit perfectly on these burgers.)

If you want raw onion on your sliders (I personally can’t imagine a burger without onion!) then while the burgers are cooking you can cut up about half a large onion. (Cut the half into quarters and then slice up each quarter.) You can also prep the buns by taking 3 large kaiser rolls and cutting them into quarters. Open up each mini-bun and add the onion (if desired) to each one and top with a drizzle of your favorite barbecue sauce. Put a burger on top of each, and then break each slice of bacon into quarters and put two pieces on each burger.

Bacon

Put the caps on each burger, put them on a serving dish, and you’re done!

DSC_7010

You might find yourself making these a lot more than just when you’re entertaining!

Full Recipe:

Bacon Cheeseburger Sliders

Yield: 12 sliders

Ingredients:

6 pieces bacon
1 pound ground beef
1 tsp salt
1 tsp onion powder
1 tsp garlic powder
1 tsp oregano
1/2 tsp cayenne
3 slices pre-packaged pepper jack cheese
3 large Kaiser rolls, cut into quarters
1/2 large onion, cut into quarters and sliced
Barbecue sauce, for topping

Process:

1) In a large skillet over medium low heat, cook bacon for 2-3 minutes per side or until crispy. Set aside on a paper towel.

2) Combine beef, salt, onion powder, garlic powder, oregano, and cayenne together in a mixing bowl. Form the beef into 12 (three inch) patties.

3) In the same pan that you cooked the bacon, over medium heat, cook the 12 patties for 3-4 minutes on the first side and 2-3 minutes on the second side. If they don’t all fit comfortably in the pan, do 2 batches.

4) Add 1/4 of a slice of pepper jack cheese to each burger just before they are finished cooking, and then remove from heat.

5) Open each mini bun and top with onion, barbecue sauce, and then each burger.

6) Break each slice of bacon into quarters and then place 2 pieces onto each burger.

7) Cap the burgers and serve immediately.

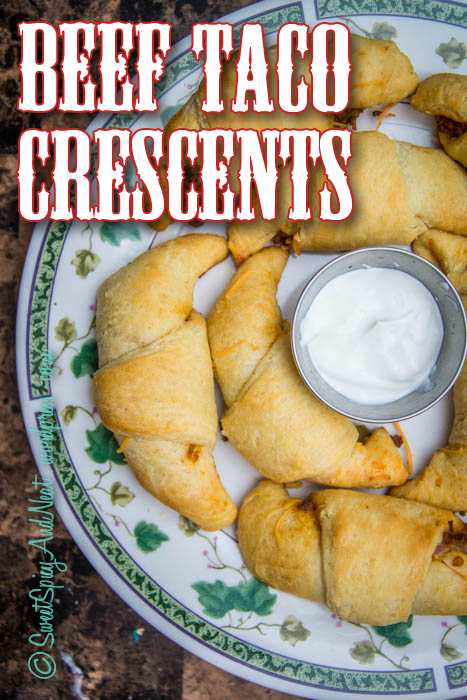
*Super Bowl Week* Beef Taco Crescent Rolls

It doesn’t seem like that long ago we were all counting down the days until the start of pre-season, and now suddenly the ever-anticipated Super Bowl is upon us again!

I’m a huge football fan, and of course I love to cook for people, so my house is normally a gathering place for Super Bowl every year, since I love to entertain! I’m going to focus this week on some awesome recipes for entertaining on the big day, so keep checking back for more new ideas!

I decided to kick things off (pun intended!) with a great finger food with a Mexican flair – all the goodness of tacos, wrapped up in easy to eat crescent rolls! As I already stated in my Handheld Apple Pie recipe, I just adore the versatility of crescent roll dough!

Finished Text

Wrapped up in delicious crescents is one of many ways to use this recipe – it would also make a fabulous hearty dip for chips or you could even use it to make sliders or full size sandwiches. However, I really like the neatness and compactness of the crescents.

Start by preheating your oven to 375 degrees and lining two baking sheets with non-stick foil. Then, coat a frying pan in about 1 tbsp of oil and brown about 1/4 pound of ground beef in the pan over medium low-heat. (2-3 minutes.)

ground beef

While the meat is browning, dice up 1/2 of a green pepper and 1/4 of a red onion.

Pepper and onion

Once the meat has browned, turn the heat down to low, add the onion and pepper, and sprinkle with seasonings. I used 1/2 tsp salt and then cheated a little by using 2 tsp of McCormick’s “Perfect Pinch” Mexican spice mix. If you don’t have a Mexican spice mix, you can do 1/2 tsp each of cayenne, garlic powder, cumin, and cilantro.

Simmer

Stir to combine, and then cover and let simmer for about 3 minutes.

While that is cooking, prepare your crescent dough. You’ll need two packages (8 crescents each) of the dough; Unroll each section of dough and separate out the triangles so they are all lying flat your prepared baking sheets.

After you’ve let your beef, onions, and peppers simmer, remove the lid and add 1/2 cup of your favorite salsa. (I personally like medium, but feel free to kick it up a notch with a hotter salsa!) Stir this in and then remove the pan from the heat.

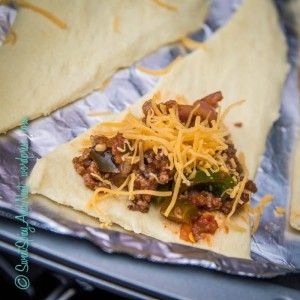
Assemble the crescents by spooning about 1 tbsp of the filling onto each crescent, sprinkling cheddar cheese on top, and then rolling them up.

Pre bake

MAKE OR BREAK TIP: Do each crescent one at a time! (Place the filling, sprinkle cheese, roll up.) The heat from the filling will make the dough soft very quickly, and if you let it sit too long, it will become too thin and fragile to roll up properly!

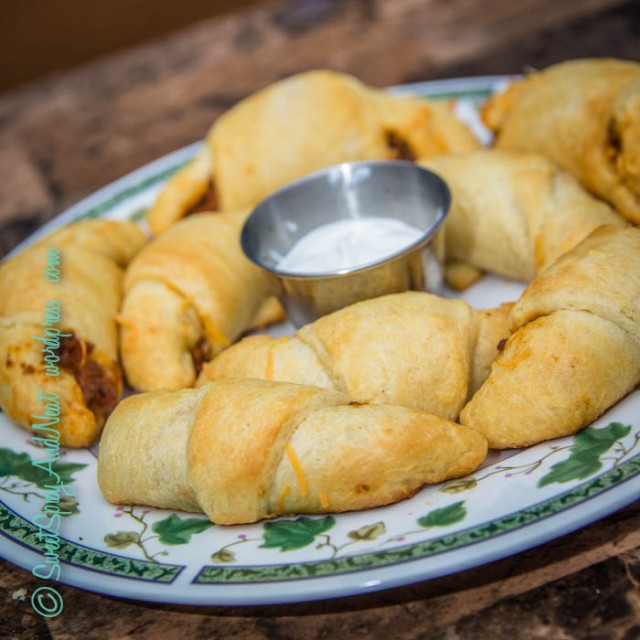
Once all the crescents are rolled, bake them for 12 minutes or until they are golden brown. Let them cool for a minute or two, and then serve with sour cream!

Finished 2

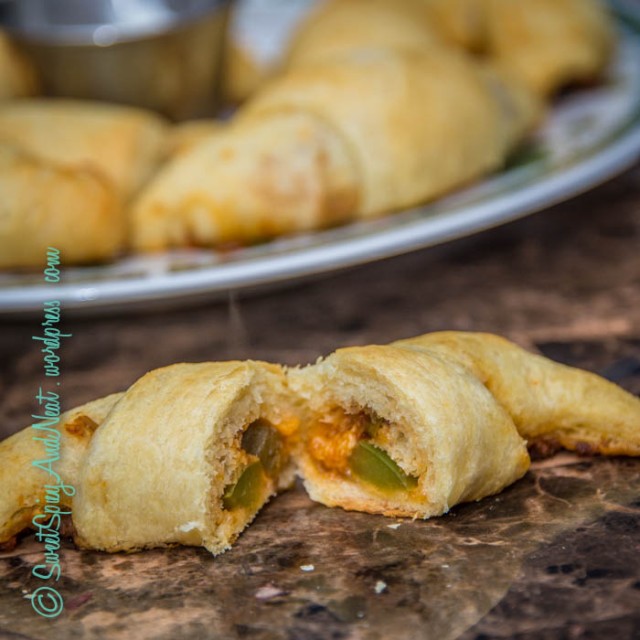
They really are fabulous, and there’s just enough filling inside to give it a nice kick without being messy!

Finished 3

Like I said earlier, feel free to try the filling served with tortilla chips or on sliders, too!

Full Recipe:

Beef Taco Crescent Rolls

Yield: 16 rolls

Ingredients:

2 packages crescent roll dough
1 tbsp oil
1/4 pound ground beef
1/2 green pepper, diced
1/4 red onion, diced
1/2 tsp salt
2 tsp McCormick Mexican spice mix (or 1/2 tsp each cayenne, garlic powder, cumin, & cilantro)
1/2 cup salsa
1/2 cup shredded cheddar cheese

Process:

1) Preheat oven to 375 degrees. Line two baking sheets with non-stick aluminum foil.

2) Coat a frying pan in 1 tbsp of oil over medium-low heat. Brown ground beef in the pan, about 2-3 minutes.

3) Once the beef is cooked through, add onions, peppers, and spices. Stir to combine, cover and let simmer for about 3 minutes.

4) Uncover and add salsa. Stir to combine and remove from heat.

5) Unroll each section of crescent dough and separate the triangles so they are all lying flat. Spoon 1 tbsp of filling onto one triangle at the wide end, sprinkle with cheese, and then roll up the crescent. Repeat with all 16 dough triangles.

6) Bake for 12 minutes or until golden brown. Remove from oven, let cool for 1-2 minutes, and then serve with sour cream.

Tuscan Pasta with Sausage in Lemon Blush Sauce

This one’s gonna be good – we’re traveling to Italy for this one! 🙂

As I’ve mentioned before, I’ve had the pleasure of going to Italy and exploring the various culinary tastes the country has to offer. Tuscany is probably my favorite region of Italy… Rome is great and all, especially for history buffs, but it’s housed in the central coastal territory of Lazio. Tuscany is just above Lazio, also on the coast, but contains gorgeous scenery and fabulous cities like Lucca, Pisa, and my favorite, Florence. (Known to the Italians as Firenze. Also, Tuscany in Italian is referred to as Toscana.)

If you’ll allow me to nerd out for just a moment, here’s a couple photos from Florence that may help to illustrate why I love it so much: (More photos at the bottom from Lucca and Pisa.)

DSC_0007

DSC_0011

Both photos were taken along the famous Arno river. And if the beautiful scenery isn’t enough to convince you, just know that Florence is known for farming… especially cattle. Which means fabulous leather goods for a fraction of what you’d pay in the States, and: the best. steak. ever. No joke.

Once you get finished booking your flight to Italy, though, I’ll show you how to create a dish (albeit it not steak) that just oozes Toscana with every bite.

Finished Text

Blush sauce is this fabulous blend between a cream sauce and a red tomato-based (pomodoro) sauce. I kicked up the pasta a little by adding smoked sausage, but this would also be great meat-less, as well!

Finished 1

The prep photos I show are for my lowly serving for one person, but I’ve adjusted the recipe for this blog post to feed four to six people. So, when your pans look fuller than mine, don’t panic!

Cook your pasta according to the directions on the package. I used Farfalle (bow-tie) pasta but you could do any bite-size pasta. Penne would also be great! A one pound box of pasta is typically enough for 4-6 servings.

While you’re waiting for your water to boil, do some prep work. Dice 1/4 of a large onion (or 1/2 of a small one), mince 3 cloves of garlic, take a cup of cherry tomatoes and cut each one in half lengthwise, and cut one package of smoked sausage (usually 14 oz) into 1/2 inch pieces. (I really like kielbasa, but any smoked sausage would do!)

Once you add your pasta to the boiling water, add your sausage to a large frying pan coated in olive oil over medium high heat. As long as you’re using smoked sausage, you only need to brown it. If you’re using a raw sausage (such as chorizo) then you should cook the links first, then cut them, and then combine them with the rest of the ingredients.

Once the sausage has browned (only a couple of minutes), add the diced onion and 1 cup of frozen peas. Toss this to combine, then reduce heat to low and cover.

Sausage onion peas

Let that simmer for 4-5 minutes, then add your minced garlic. Toss to combine, let cook for an additional minute, and then remove everything from the pan into your serving dish (temporarily).

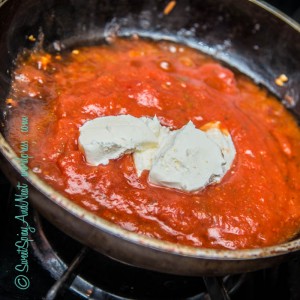
Return the pan to your burner on low heat and add 1 & 1/2 cup tomato sauce and 4 ounces of cream cheese. (Half an 8oz block.)

Sauce 1

Stir this gently for a minute or two until the cream cheese has melted and is incorporated into the sauce. Add in about 3/4 cup of grated Parmesan cheese and melt this in as well, along with the juice of 1 lemon, salt, pepper, and basil, then remove it from the heat and add in your halved cherry tomatoes. (To make it extra lemony, add in the zest from the lemon as well!)

Add tomatoes

Once you’ve drained your pasta, add it to the serving dish on top of the sausage and pour the sauce on top. Stir it to combine everything, and serve topped with fresh grated Parmesan.

Finished 3

Full Recipe: (Extra Italy photos are below the recipe.)

Tuscan Style Pasta in Blush Sauce

Yield: About 4 servings

Ingredients:

One box uncooked bite-size pasta (like Farfalle or Penne)
4 quarts water

1 tbsp olive oil
1 package smoked sausage, like kielbasa, sliced into 1/2 inch pieces
1/4 large red onion, diced
1 cup frozen peas
3 cloves garlic, minced

1 & 1/2 cups tomato sauce
4 ounces cream cheese
3/4 cup grated Parmesan cheese, plus more for garnish
Juice of 1 lemon (zest optional)
1 cup cherry tomatoes, halved
1 tsp salt
1 tsp pepper
1 tsp basil

Process:

1) Cook pasta according to package directions. While pasta is cooking, proceed with the remaining steps.

2) Coat a large frying pan in olive oil and heat over medium-high heat. Add sliced sausage and brown for 3-4 minutes.

3) Reduce heat on frying pan to low, then add peas and diced onion. Toss to combine. Cover and let simmer for 4-5 minutes.

4) Uncover sausage and add minced garlic. Cook for another minute, then remove everything to your serving dish.

5) Return pan to low heat and add tomato sauce and cream cheese. Stir gently until cream cheese is melted, and then add in 3/4 cup Parmesan cheese.

6) Once all of the cheese has melted, stir in lemon juice, salt, pepper, basil, and tomatoes. Remove from heat. Add sauce and drained pasta to serving dish. Stir to combine and serve immediately. Garnish with fresh grated Parmesan.

As promised, here’s a few more photos from around Tuscany…

This one is in Lucca, during the early afternoon when all the shops were closed for lunch.

DSC_0067

Three guesses where this one’s from! Yes, it really does “lean”! It was originally intended to be the bell tower for the cathedral, but obviously since it’s always been leaning, it never made it to that purpose!

DSC_0098

This is also in Pisa, looking from the tower back toward the entrance to the walled section of the city. This building is the baptistry, the first of the three iconic buildings of Pisa. (In between the tower and the baptistry is the cathedral.)

DSC_0102

This one is, of course, not in Tuscany, since I said earlier that Rome is located in Lazio, but I couldn’t resist adding this super romantic night time Colosseum photo!

DSC_0407